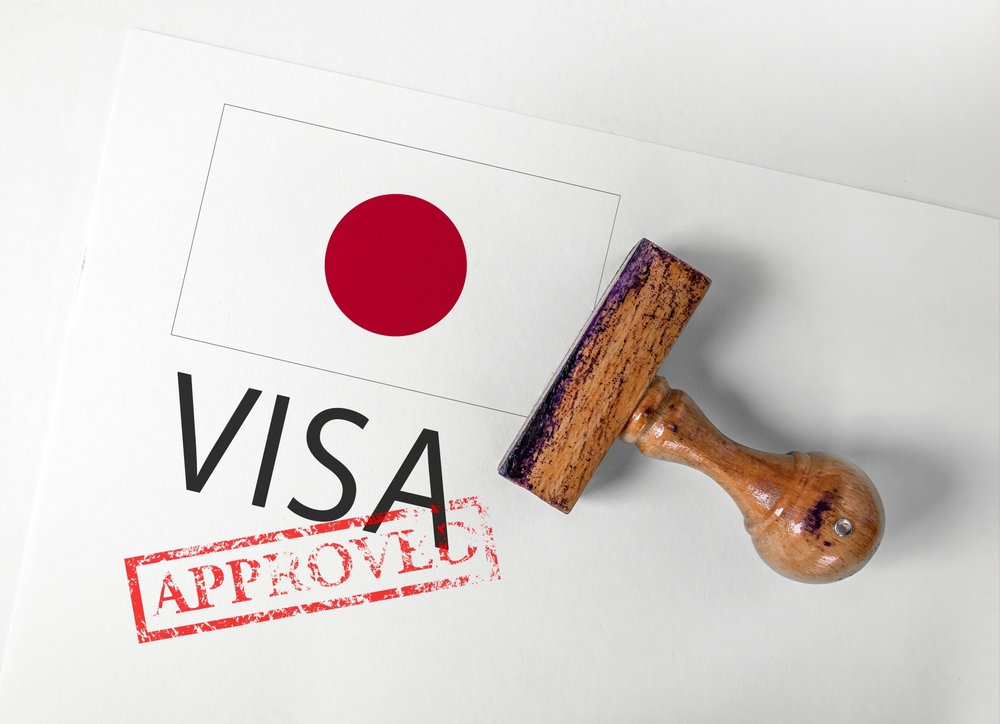
Japan digital nomad visa: income rules, stay length, steps
Ever wished you could spend six months riding the Shinkansen between Tokyo and Fukuoka, work from a quiet Kyoto machiya in the morning, then hit onsen at night—without quitting your remote job?
Good news: Japan’s digital nomad visa makes that possible—if you meet the income rule and follow a few clear steps. The problem is, most advice out there is a maze.
Why most people feel stuck and confused

I keep hearing the same pain points from readers who message me after falling into a rabbit hole of tabs:
- “Is it 3 months or 6 months?” Some guides mix up tourist stays with the nomad status.
- “What’s the 10,000,000 JPY rule?” Not everyone explains what counts as income—or how to prove it.
- “How do I count my days?” Day 1 isn’t always the day you land, which trips people up when booking flights.
- “Can I extend?” Many posts hint you can. You can’t—at least not inside Japan on this status.
- “What about leaving and re‑entering?” No, “visa runs” don’t reset your clock here.
Some info is outdated, some is copied from early announcements, and some skips the official wording altogether. For clarity, I cross‑check with the Ministry of Foreign Affairs (MOFA) and local embassy pages before I publish. When rules shift, they update there first.
Short version you came for: Japan’s digital nomad status targets remote workers with foreign income, sets an annual income threshold of 10,000,000 JPY, caps stays at up to six months in one go, and doesn’t allow in‑country extensions under current guidance.
Why all the interest? Japan is a remote‑work sweet spot: world‑class internet, bulletproof transport, late‑night food, and a time zone that plays well with the U.S. West Coast and Europe for split‑shift teams. Tokyo consistently ranks as a top remote‑work hub on communities like Nomad List, and Fukuoka has quietly become a favorite for founders who want balance without sacrificing speed.
What I’m going to do for you
I’ll cut through the noise and translate the official rules into plain English. No fluff, no guesswork. I’ll explain:
- Who qualifies (and who doesn’t), including the type of work that fits
- The 10,000,000 JPY income requirement, what proof usually works, and common mistakes to avoid
- How long you can stay (the six‑month cap), how to count your days correctly, and what happens if you leave and come back
- Why there’s no extension inside Japan—and the six‑month wait before you can apply again
- A clean, step‑by‑step checklist so you can apply once and get on with planning where to live, work, and eat
When in doubt, I’ll point you to the official sources (MOFA, your local Japanese embassy, and the Immigration Services Agency). If you prefer to check the rules directly, start here: MOFA visa information and your nearest Japanese embassy/consulate site.
What this guide covers (and what it doesn’t)
I keep this practical and focused on getting approved and making your stay smooth.
- Covered: eligibility, acceptable work types, the 10M JPY rule, insurance that qualifies, documents you’ll need, timelines, day counting, what you can and can’t do on this status, and useful on‑the‑ground tips (housing, SIMs, coworking).
- Not covered: long‑term residency paths, student visas, Japan‑sourced employment routes, or deep tax planning for complex situations. For taxes, I’ll flag the basics and where to get expert help.
If your goal is simple—earn from abroad, live in Japan for up to six months, and stay compliant—you’re in the right place. I’ve tested the logistics myself and cross‑checked the paperwork with readers who recently applied.
Ready to see if you actually qualify—and how to avoid wasting time if you don’t? Let’s sort that next.
Who actually qualifies for Japan’s digital nomad visa

I’ve sifted through the official notices and the messy forum rumors so you don’t waste time. Here’s the straight answer on who fits, who doesn’t, and what proof tends to get a yes.
“This isn’t about gaming a visa—it’s about showing you already work globally and you’re simply bringing your laptop to Japan.”
The right kind of work
This status is for people who earn from outside Japan and can keep doing that while living there temporarily. If any part of your income is Japan‑sourced, hit pause—this category is not for you.
- Remote employees: You’re on payroll with a foreign company (e.g., US, UK, EU, AU, SG). You keep your foreign contract, foreign payroll, and foreign clients.
- Freelancers/contractors: You invoice clients abroad. Think software dev, designer, marketer, consultant—with contracts and invoices tied to non‑Japan entities.
- Founders/owners: You run a foreign company and pay yourself from it. The company is registered outside Japan, and your customers aren’t in Japan.
Real‑world examples I’ve seen work:
- US employee earning a fixed salary from a Delaware C‑Corp, paid into a US bank account.
- German freelancer with long‑term retainers from EU clients, issuing monthly invoices to French and Dutch companies.
- Singapore founder drawing a salary from a Singapore Pte Ltd serving APAC clients (none based in Japan).
Red flags that usually lead to a no:
- Any contract listing a Japan address or a Japan client.
- Plans to find local gigs “on the side” while in Japan.
- Getting paid by a Japan entity, even if you say the project is “global.”
The income rule (10,000,000 JPY+ per year)
You must show annual income over 10,000,000 yen (about USD 65k—exchange rates move). Think of it as a stability check: steady, verifiable income from outside Japan.
What proof typically works best:
- Tax returns/assessments for the latest year (e.g., US 1040 + W‑2/1099, UK SA302, Germany Steuerbescheid, Australia Notice of Assessment).
- Employer letter on letterhead stating role, annual gross salary, and remote‑work arrangement, signed and dated.
- Contracts + invoices for freelancers (showing agreed rates/retainers and recent paid invoices).
- Bank statements matching your pay/retainer deposits (3–6 months is smart; more if income fluctuates).
- If you’re a founder: company registration + proof you pay yourself (pay slips, board resolution, or payroll reports).
How to clear the yen threshold with confidence:
- Add a buffer for FX swings. 10M JPY is the floor—submit enough to show you’re comfortably above it. I aim for ~10% buffer after conversion.
- Use a consistent conversion source (e.g., your bank’s rate on the date of your documents, or a reputable reference like OANDA). Include the printout.
- Translate non‑English/Japanese documents with a simple translator’s note. Clean, readable, and consistent names/addresses matter.
Sample scenarios I’ve helped readers with:
- Remote employee (Canada): CAD 95,000 salary. Using a conservative rate that puts this at JPY ~10.5–11.0M, they submitted: employer letter, last year’s T1 assessment, last 6 pay slips, and 6 months of bank statements. Approved.
- Freelancer (Germany): EUR 78,000 profit on Steuerbescheid + three active contracts (EUR monthly retainers) + 6 months of paid invoices and bank receipts. Approved.
- Founder (Singapore): SGD 9,500 monthly salary from their Pte Ltd (annual SGD 114k), 12 months of pay slips, company BizFile, and statements showing payroll credits. Approved.
Common mistakes that trigger delays or denials:
- Projecting future income instead of showing last year’s proven numbers.
- Submitting only screenshots (upload PDFs or scans; screenshots look flimsy).
- Mismatched names (company pays the business account, but you only submit personal bank statements—explain the flow and include both).
- Currency conversions with today’s optimistic rate that barely clears 10M JPY—then rates shift. Keep that buffer.
If you have substantial investment income or one‑off windfalls, don’t assume it counts. Some posts accept only earned income; others will look at taxable income on your assessment. Ask your local Japanese consulate how they interpret the rule for your case before you book flights.
Eligible passports and basic conditions
Eligibility generally ties to two things: your country has a visa‑waiver arrangement with Japan and a tax treaty with Japan. This combination narrows the field and can change, so check the official pages:
- MOFA: Visa‑exemption arrangements
- Ministry of Finance: Japan’s tax treaties
- Immigration Services Agency (ISA) for policy updates
Typical examples that tend to qualify: the US, Canada, most EU countries, the UK, Australia, New Zealand, Singapore, South Korea, and a handful of others that meet both criteria. If your passport isn’t on both lists, this category likely won’t be available yet.
Other baseline checks I remind readers about:
- Passport validity that comfortably covers your intended stay.
- Private health insurance for the whole period (you’ll be asked for proof).
- Clean travel history helps—prior overstays anywhere can raise questions.
One quick myth buster: this category does not turn you into a Japan taxpayer by default. Tax residency is about days and source of income, which I’ll simplify later—but for eligibility, your focus is foreign income and that 10M JPY proof.
Bringing family
Yes, your legal spouse and dependent children can come as your dependents if you meet the income rule and carry qualifying private insurance for everyone. Partners without legal marriage proof may not be accepted—ask your consulate if they recognize de facto partnerships (policies vary).
Documents dependents are usually asked for:
- Marriage certificate and/or birth certificates, apostilled/legalized if required, plus translations into English or Japanese.
- Insurance certificates listing each family member with coverage for the full stay.
- Proof of relationship and cohabitation if names differ or addresses have changed (utility bills, joint leases).
Practical tips from families who got approved:
- Apply together so the files reference each other—keep names, addresses, and itineraries consistent.
- Bring extra copies of every document and translation. Consular windows love clean sets.
- Dependents generally cannot work in Japan under this status—plan accordingly.
If you’re reading this and thinking, “Okay, I qualify—how exactly does the six‑month clock work once I land?” Good question. Next up I’ll show you the precise day‑counting method Japan uses (with real date examples) so you don’t accidentally overstay by a day.
Stay length and how to count your days (with examples)
Six months in Japan sounds simple until the calendar math kicks in. This is the part that trips up smart travelers: when does the clock start, what counts as a “day,” and what happens if you hop out to Seoul for a long weekend? I’ll make the timing foolproof so you don’t lose a single day—or overstay by accident.
“Plans are useless, but planning is indispensable.” — Dwight D. Eisenhower
Maximum stay: 6 months, in one go
The status is capped at six months. It’s a single, continuous window. You’ll see an “until” date on your landing permission (and, if issued, your residence sticker). That printed date rules your life—treat it as law. No in‑country extension, so assume your countdown ends there.
- Key habit: the minute you pass immigration, snap a photo of the stamp with the “until” date and set calendar alerts for 30/14/7/3 days before it.
- Reality check: six months is a calendar period, not “180 days you can spread out later.” It runs once and ends once.
How to count the days (official method)
The official counting method is simple: your arrival day is Day 0. Day 1 starts the first full day after you arrive. Your last permissible day in Japan is the “until” date printed by immigration.
- Example A: short stay logic (same rule scales up)
Arrive March 1 → Day 1 is March 2. If you were granted 15 days, you must depart no later than March 16. That’s 15 full days counted from March 2. - Example B: your 6‑month window
Arrive March 1 → Day 1 is March 2. Immigration will print a specific “until” date that falls about six calendar months later. Trust the stamp. If it shows “until September 1,” you can legally be in Japan through September 1 and must fly out that day at the latest. - Example C: late‑night arrivals
Touch down at 23:45 on June 10? Day 1 is June 11. Time-of-day doesn’t change the rule; dates do. - Why I always double‑check the sticker: calendar months get weird (think February, 30 vs 31). The printed “until” date removes guesswork. If the math you did conflicts with the stamp, the stamp wins.
Pro move: keep a tiny “departure margin.” If your “until” date is September 1, aim to fly August 31 or earlier. You’ll thank yourself if weather or schedules wobble.
If you leave and re‑enter
Leaving Japan during your six months does not pause your clock. The window keeps running in the background.
- Scenario: Land April 10, head to Taiwan May 20–23, re‑enter May 23. Your “until” date stays the same. Those days out of Japan aren’t added back.
- Entry type matters: some missions issue this status as single‑entry, others as multiple‑entry. If it’s single‑entry and you leave, you may be done unless you had re‑entry permission. Confirm with your embassy/consulate before planning side trips.
- At the border: carry printouts of your approval, income docs summary, and private insurance. Re‑entry officers sometimes ask quick questions if your status is uncommon.
Bottom line: go take that weekend in Busan if your visa allows multiple entry—but assume the clock keeps ticking back in Japan.
Overstays and buffer days
Japan is famously kind and famously strict. Overstay even by one day and you can face questioning, fines, a record that haunts future applications, and in serious cases, deportation with a re‑entry ban. The Immigration Services Agency spells out removal and entry‑ban rules—don’t test them.
- Build a cushion: plan to depart 24–48 hours before your “until” date. Avoid the last flight of the last day.
- Weather watch: typhoon season typically peaks August–October (source: Japan Meteorological Agency). Storms can wipe out dozens of flights in a day.
- Delays happen: in major markets, around 1 in 5 flights run late by 15+ minutes in a typical year (consistent with public data from BTS/FlightAware). Even Japan’s ultra‑punctual carriers aren’t storm‑proof.
- Backup routes: if you’re leaving from a smaller airport, keep a plan B to a hub (Shinkansen to Tokyo/Osaka). Book a fare you can move by a day without a meltdown.
- Paper trail: keep screenshots of your “until” date, e‑tickets, and any airline disruption notices. If you’re stuck, these help show you acted in good faith and tried to depart on time.
Quick checklist I use:
- Confirm the printed “until” date at the airport.
- Calendar reminders: 30/14/7/3 days before, plus one at 9 a.m. on the last day.
- Book outbound for at least the day before the “until” date.
- Plan B route if weather hits.
What if you love it so much you want to push past six months? Can a quick hop to Seoul reset your clock? Or is there a smarter way to line up the next stay without risking a black mark? I’ll answer that next—and clear up the “visa run” myth once and for all.
Extensions, reapplying, and the “visa run” myth

If you’re the kind of traveler who plans “just in case” extra time, this is the moment to lean into that habit. The Japan digital nomad visa has a hard wall you can’t climb over with paperwork, sweet talk, or last‑minute flights.
“The rules won’t bend for your itinerary. Bend your itinerary for the rules.”
No extension inside Japan
There’s no in‑country extension for this status—none. The maximum is six months, and that cap applies even if you arrive late at night, leave for a week in the middle, or try to ask immigration for “just 10 more days.” When your authorized stay ends, you must exit Japan.
It helps to remember how Japan structures things:
- The visa issued by a consulate lets you enter Japan.
- The landing permission you get at the airport controls how long you can stay.
That landing permission is where the six‑month countdown lives. Once it’s over, it’s over. No “extension line,” no “upgrade window,” no “conversion because my project got extended.” If you want to switch to a different status later (like work or highly skilled), you’d need to qualify for that status in the usual way, from scratch.
Real example: I met a UX designer from Spain in Fukuoka who hit day 178 while closing a big US client project. She tried to ask for an extra week to hand off—immigration politely said no. She flew to Seoul, finished the handoff from a coworking space, and avoided a headache that would have made returning to Japan later much harder.
The 6‑month wait rule to reapply
After you use this status for its full period, there’s a mandatory six‑month cool‑off before you can apply again for the same status.
Here’s how to think about the clock:
- When does the wait start? Practically, consulates count from the end of your authorized period or your exit—whichever aligns with their internal guidance. To avoid surprises, confirm with the specific Japanese embassy/consulate you’ll apply at next time.
- What if you leave early? Leaving at month four doesn’t guarantee you can reapply two months later. Many posts treat the six‑month wait as tied to the authorized stay, not how many days you used. Ask your consulate in writing and keep their reply.
Keep these documents for your next application (yes, they help):
- Copy of your previous visa sticker and landing permission
- Photos of entry/exit stamps or airline/ePass boarding records
- Your private health insurance certificate (policy wording and coverage limit)
- Income proof you used last time (plus the newer tax return or payslips)
- Employer/client letters that clearly state non‑Japan‑sourced work
Timeline snapshot: You arrived on April 10. Your six months end on October 9. Most consulates will tell you: earliest reapply window starts around April 10 the following year—roughly six months after your permitted stay ends. Don’t guess; email the consulate you plan to use next and cite your exact dates.
For policy context straight from the source, bookmark Japan’s official visa information pages here: MOFA visa basics. Some consulates also post local notes about the new digital nomad category—those local notes win if there’s any mismatch.
Why “visa runs” don’t work here
The classic backpacker move—pop to Seoul or Taipei for a weekend and come back “fresh”—doesn’t reset anything for this status.
- Leaving and re‑entering doesn’t restart the six months. You’re capped across the whole authorization, not per entry.
- A new entry requires a new visa. And that’s blocked by the six‑month wait rule once you’ve used your digital nomad period.
- Overstays are a dead end. Japan is strict. The Immigration Services Agency notes that overstaying can lead to detention and re‑entry bans that can stretch years. If you care about coming back, don’t test the line. Reference: Immigration Services Agency.
What does help if you want long‑term, recurring time in Japan?
- Plan your six months like a season. Front‑load bucket‑list travel, then slow down with a favorite base for deep work.
- Use the cool‑off strategically. Spend your off‑period in nearby hubs—Seoul, Taipei, Bangkok, or Kuala Lumpur—keeping your time zones aligned with clients.
- Keep your paperwork pristine. Clean income proof, clear foreign‑source contracts, and proper insurance make reapplications painless.
- Consider other legal paths if your life shifts. If you get a Japan job offer or meet a different status’s criteria later, follow that route with the right Certificate of Eligibility.
I know it’s tempting to try a shortcut when you’re in the flow and loving life in Japan. But in my notes from dozens of consulate calls and readers’ experiences, the pattern is crystal clear: the system favors planners, not improvisers.
Want to lock in your next stay without guesswork? In the next section I lay out the exact checklist I use—documents, insurance, timelines, and the small details that get first‑time approvals. Ready to see what to prepare before you even book flights?
Step‑by‑step: how to apply (and get it right the first time)

Here’s the exact, no-stress path I use and recommend. Think of this as your preflight checklist: clear, repeatable, and built to avoid the usual “please resubmit” emails from consulates.
“Clarity is kindness—especially to your future self at the consulate window.”
Prep your income proof
The 10,000,000 JPY annual income rule is non-negotiable. Your job is to make that number unmistakable on paper.
- Show a 12‑month picture: I include the most recent tax return + the last 6–12 months of payroll slips or invoices. Consulates want stability, not a one-month spike.
- Convert to JPY once, consistently: Add a simple cover page that totals your income and converts it to JPY using a reputable source (e.g., XE, OANDA) with the date and rate noted.
- Build a margin: Currency moves. I aim for at least 10–15% above 10,000,000 JPY on paper to avoid FX “oops” moments between submission and decision.
- Employment vs. freelancing:
- Remote employee: Employer letter stating role, fully remote status, salary (annual), and that the employer is based outside Japan. Put it on letterhead, signed, with contact info.
- Freelancer/Founder: Client contracts or a founder income letter + invoices + bank statements showing payments from overseas entities. Consistency is king.
- Don’t hide the ball: If you have multiple streams (salary + dividends + rental), list them clearly and separate foreign vs. Japan-sourced. Japan-sourced income is not allowed for this status.
My sample “income pack” that’s worked across multiple consulates:
- 1-page cover summary (income totals + JPY conversion + document index)
- Latest tax return (full pages)
- 6–12 months of payslips OR invoice list with matching bank credits highlighted
- Employer letter or client contracts (signed, on letterhead)
- Recent bank statements showing incoming payments
Insurance that meets the rule
Private health insurance is mandatory. The policy needs to cover medical care in Japan and include medical evacuation/repatriation.
- Medical + evacuation: Pick a plan that clearly states medical coverage and repatriation. Many consulates like to see high limits (e.g., USD 100k+ medical), but confirm with your local Japanese consulate because requirements are set locally.
- Name and dates must match: Your policy certificate should list your name exactly as in your passport and cover your intended stay.
- Proof that’s easy to read: Provide the certificate of insurance + a one-page benefits summary. If it’s a long booklet, highlight the relevant clauses.
- Dependents too: Spouse and kids must each have their own qualifying policy covering Japan.
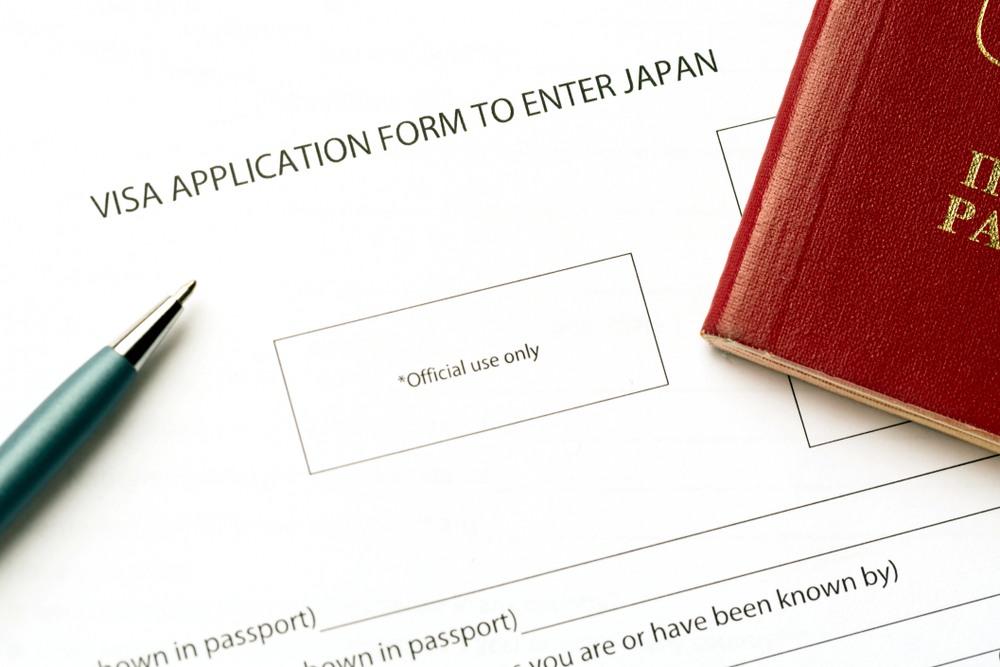
Document checklist
Use this as your print-and-tick list. If a document isn’t in English or Japanese, add a simple translation.
- Passport (valid 6+ months, 2+ blank pages)
- Visa Application Form to Enter Japan (typed if possible, no blanks—write “N/A” where needed; available from your local embassy/consulate site)
- Photo (45mm x 35mm, plain background, taken within 6 months)
- Income proof pack (see above)
- Employment letter or client contracts (clearly stating foreign employer/clients)
- Insurance certificate (medical + repatriation, naming Japan, dates covering the full stay)
- Itinerary (simple plan: arrival city, rough route; no need for a minute-by-minute schedule)
- Accommodation (at least first 7–14 days of bookings; hotel or serviced apartment is fine)
- Return or onward flight (some consulates ask; book refundable or use a temporary reservation)
- Proof of residence in the consulate’s jurisdiction (utility bill, lease, or local ID—many posts require this)
- For dependents: marriage certificate, birth certificates, proof of shared address, insurance, and passports; often apostilled/legalized + translated
Pro tip: I staple related sets together and index them. The easier it is to read, the smoother your interview (if they call you in).
Where to apply, fees, and processing time
- Where: Apply at a Japanese embassy/consulate outside Japan, usually the one with jurisdiction over your place of legal residence.
- How long: Typical processing runs about 1–4 weeks. Some posts are faster, some slower—holidays and busy seasons matter.
- Fees: Vary by nationality and change periodically. Expect roughly the local-currency equivalent of JPY 3,000–6,000 for most cases. Check the current fee list on your consulate’s website.
- Payment: Often cash only in local currency or certified money order; read your consulate’s instructions before you go.
- Submission: Many posts require in-person submission; a few accept mail or an accredited visa center. Book appointments early.
Find your nearest Japanese embassy/consulate and read their exact checklist—local posts can add small, important details.
Bringing your partner or kids
Plan to apply together so the officer sees the full household picture.
- Who counts: Generally, legal spouse and minor children. Unmarried partners are usually not accepted as dependents—check your consulate’s stance.
- Docs to prepare:
- Marriage certificate and/or birth certificates (apostilled/legalized if required, plus translations)
- Insurance certificates for each family member
- Proof of shared address and family relationship (utility bills, joint bank statements, family photos can help as secondary evidence)
- Your income proof showing it comfortably supports everyone
- Applications: Dependents submit their own forms with your supporting docs attached. Keep the packages cross-referenced.
Two real-world application packs that worked
- Remote employee (US → Japan):
- Employer letter confirming full-time remote, USD salary, and US-based company
- Last year’s IRS return + last 12 months of payslips
- US bank statements highlighting payroll deposits
- Private insurance with medical + evacuation for 6 months
- Tokyo hotel booking for 10 nights + refundable return ticket
- Freelancer (EU → Japan):
- Three active client contracts stating retainer rates and non‑Japan scopes
- Invoice log + 12 months of bank credits from overseas clients
- Latest tax return + accountant letter summarizing last 12 months’ revenue
- Global health insurance plan covering Japan, certificate + benefits summary
- First 2 weeks of accommodation + onward flight reservation
Quick mistakes to avoid (these trigger rework)
- Submitting income exactly at 10,000,000 JPY with no FX buffer
- Insurance that doesn’t explicitly cover Japan or omits evacuation/repatriation
- Employer/client letters with no signature or contact details
- Applying at a consulate where you don’t have proof of residence
- Leaving blanks on the application form (write “N/A” instead)
If you assemble your pack this way, you’ll walk into the appointment feeling calm and come out with fewer follow-up requests. And once that sticker is in your passport, what exactly can you do—and not do—while you’re in Japan on this status? Ready for the line you can’t cross (and the freedoms you absolutely have)?
What you can and can’t do on this status

“Play by Japan’s rules, and Japan plays nice back.”
Work scope: keep your income foreign
This status is made for people who already earn from outside Japan. Think of it as “bring your job with you,” not “find a job here.” In practice, that means:
- Allowed: getting paid by a non‑Japanese employer, invoicing overseas clients, operating your foreign company remotely, receiving salary into foreign accounts, and hopping on Zooms with teams abroad.
- Not allowed: taking Japan‑sourced work or getting paid by a Japan‑based entity. No local contracts, no cash gigs in Japan, no consulting to a Japanese client—even if it’s “just one project.”
Real‑world examples I’ve seen work smoothly:
- US software engineer on payroll with a US company, paid to a US bank, coding from Fukuoka.
- EU designer invoicing EU clients via Stripe/Wise, working from a Tokyo coworking space.
- Founder of a non‑Japanese LLC managing teams and clients abroad while basing in Osaka.
And the kind that gets people in trouble:
- Shooting a paid campaign for a Tokyo brand, even as a “one‑off.”
- Teaching paid in‑person classes in Japan (yoga, language, coding, etc.).
- Signing an employment contract with a Japanese company or being paid to a Japanese bank.
Quick sanity check: if the client is in Japan or the payer is a Japanese entity, it’s a no.
Taxes, simply put
I keep this simple and conservative:
- Stay under 183 days in a calendar year and you’re typically not treated as a Japan tax resident. But Japan’s rules hinge on “residence” and “domicile,” not only day count, so don’t create ties that look like a permanent base.
- Avoid Japan‑sourced income. Non‑residents who earn Japan‑source income face withholding (often 20.42%). This status expects you to have no Japan‑source income at all.
- Keep clean records: foreign contracts, invoices, and bank statements that show payers are outside Japan. If someone asks, you can prove your work is foreign‑sourced in 60 seconds.
- Consumption tax (10%) still applies to everyday spending. As a visitor for less than six months, you can use tax‑free shopping at participating stores—bring your passport and hit the minimums. See official guidance from JNTO: tax‑free shopping rules.
When in doubt, speak to a cross‑border tax pro. The National Tax Agency has English info here: nta.go.jp/english.
Practical life admin (the stuff nomads ask me about)
Housing that just works
- Sharehouses and monthly apartments are easiest: no guarantor or hanko, furnished, and you can book from abroad. Look at Oakhouse, SAKURA HOUSE, LeoPalace 21, and serviced options like MetroResidences.
- Monthly stays via Airbnb/Booking can be great for 1–3 months, then switch. In Tokyo, expect roughly 100,000–180,000 JPY/month for a compact studio; sharehouses often run 60,000–100,000 JPY. Cities like Fukuoka or Sapporo trend cheaper.
- Tip: ask for a written confirmation of your stay dates—helpful for visa files and deliveries.
Wi‑Fi and coworking
- Japan’s internet is fast. Ookla’s Global Index typically shows strong averages for fixed broadband and solid mobile speeds—check current figures here: speedtest.net/global-index.
- Day passes are common: WeWork (various locations), BIZcomfort, FabCafe, Impact Hub Tokyo, The DECK (Osaka). Budget 2,000–4,000 JPY/day or 10,000–25,000 JPY/month for hot desks depending on the city.
- Cafés are laptop‑friendly but keep calls quiet. For long Zooms, book a phone booth at a coworking space.
SIMs and eSIMs that don’t ask for a resident card
- Tourist‑friendly providers like Sakura Mobile and Mobal ship to your hotel and don’t require a MyNumber or Japanese credit card.
- eSIMs are painless: Airalo (Moshi Moshi), Ubigi, or Holafly. Great backups even if you later pick up a physical SIM.
- Postpaid plans from local carriers usually require resident registration. If you’re not set up for that, stick to prepaid or eSIM.
Payments and banking
- Many places take cards, but small restaurants and older shops can be cash‑first. Convenience store ATMs (7‑Eleven, Japan Post) work reliably with foreign cards.
- IC cards like Suica/PASMO are king for trains and quick buys. Grab a physical “Welcome Suica” at major stations or load a Suica into Apple Wallet—super fast at gates.
- Opening a Japanese bank account is unlikely without resident credentials. I use Wise or Revolut for good FX rates and to pay deposits.
Security tip: public Wi‑Fi in cafés and stations is convenient—use a VPN and disable auto‑connect. Coffee is cheaper than a privacy headache.
Registration and other formalities
- ID on you, always. Japan requires foreigners to carry a passport or (if issued) a residence card. Keep a photo copy in your bag and the original somewhere secure.
- Address and cards: if you’re issued a residence card at the airport (this sometimes happens for stays over 3 months), you generally must register your address at your ward/city office within 14 days. If you aren’t issued a card, you won’t be registering—expect that some services (postpaid phones, local bank accounts) won’t be available. Official guidance on residence cards: Immigration Services Agency.
- Medical care: you won’t be on Japan’s National Health Insurance, so clinics may ask for proof of private coverage or a deposit. Keep your insurance certificate handy (PDF on your phone). English‑friendly options: Tokyo Medical & Surgical Clinic, St. Luke’s International Hospital.
- Receipts matter: hold onto accommodation contracts, remote work confirmations, and travel tickets. They’re handy if airline staff or an officer asks about your plans.
- Tax‑free shopping status: as a visitor under six months, you can buy tax‑free at participating stores—bring your passport and follow the store’s sealing/usage rules.
I’ve learned this the fun way and the hard way: if your income stays foreign, your paperwork stays clean, and your insurance is visible, your six months feel effortless.
Now for the fun decision—where should you base yourself so work stays smooth and every weekend feels like a mini‑adventure: high‑energy Tokyo, foodie Osaka, balanced Fukuoka, seasonal Sapporo, or tropical Okinawa? I’ve road‑tested them all—let’s compare vibes, rent, and Wi‑Fi next.
Where to base yourself for 6 smooth months

Six months in Japan isn’t a trip—it’s a season of your life. Pick the right base and your work flows, your ramen shop learns your order, and the city starts to feel like your neighborhood.
“Hurry slowly.” — Japanese proverb (isogaba maware)
I’ve road‑tested the hubs below with a laptop, a stack of calls across time zones, and a stubborn caffeine habit. Here’s how each city feels to live and work in—plus real costs, connectivity, and the small culture cues that keep your days smooth.
Top hubs for nomads
Tokyo — big energy, endless options
- Vibe: Fast, opportunity‑rich, and surprisingly easy to carve out quiet pockets.
- Best if: You need event density, enterprise clients, and late‑night food after US calls.
- Neighborhoods: Shibuya/Daikanyama for creative tech; Kanda/Nihonbashi for calmer, central commutes; Nakameguro/Koenji for community feel; Kichijoji for park life.
- Furnished rent (studio/1K): roughly 120,000–200,000 JPY/month; sharehouse 65,000–100,000 JPY.
- Cowork picks: Blink Community (Roppongi), Shibuya QWS (views + events), WeWork (multiple), CIC Tokyo (Toranomon). Most run 100–500 Mbps.
- Pro tip: Station Telecube pods are lifesavers for private calls between trains.
Osaka — food, humor, and friendly hustle
- Vibe: Warmer social energy, lower costs, straight‑talking business culture.
- Best if: You want a big‑city base without Tokyo prices.
- Neighborhoods: Namba for nightlife and convenience; Umeda for business; Shin‑Osaka for Shinkansen access.
- Furnished rent: 80,000–130,000 JPY/month.
- Cowork picks: The DECK (maker‑friendly), WeWork Namba SkyO, Osaka Innovation Hub (events).
- Weekend: Kyoto and Nara are easy day trips for a reset.
Fukuoka — balance and short commutes
- Vibe: Compact, beach and mountains close by, buzzing startup scene.
- Best if: You like a “15‑minute city” where everything just works.
- Neighborhoods: Tenjin/Daimyo (cafes, boutiques), Hakata (transport hub), Ropponmatsu (residential + study vibe).
- Furnished rent: 65,000–110,000 JPY/month.
- Cowork picks: The Company (multiple sites), WeWork Gate’s, Fukuoka Growth Next (community).
- Why here works: City policy has backed startups and flexible work for years—see Fukuoka Startup City.
Sapporo — seasons, space, and steady focus
- Vibe: Cool summers, snow‑globe winters, big portions and big parks.
- Best if: You want deep‑work mornings and nature every week.
- Neighborhoods: Odori (central, easy transit), Susukino (nightlife), Maruyama (leafy, quiet).
- Furnished rent: 55,000–95,000 JPY/month.
- Cowork picks: Regus Sapporo, Space KANTE (creative hub). Check day‑pass availability in winter.
- Winter practicality: Underground malls (Pole Town, Aurora Town) keep your commute warm.
Okinawa — sunlight and slower sprints
- Vibe: Island tempo, coral blues, and asynch work heaven.
- Best if: Your team is in different time zones and you plan clear call blocks.
- Neighborhoods: Naha (urban, walkable), Chatan/American Village (beach + cafes), Onna (quiet resort strip).
- Furnished rent: 70,000–120,000 JPY/month (seasonal swings).
- Cowork picks: howlive (island‑wide), TimeSpace Naha, Lagoon Koza (community).
- Heads‑up: Buses are slow; for longer stays, renting a car changes everything. Watch typhoon season (roughly Jun–Oct).
Costs and connectivity
Rents you can actually plan for (furnished, monthly): Tokyo 120k–200k JPY; Osaka 80k–130k; Fukuoka 65k–110k; Sapporo 55k–95k; Okinawa 70k–120k. Sharehouses shave 20–40% off and make it easier to meet people.
Internet you can trust: Japan’s median mobile speeds routinely top 50 Mbps and fixed broadband often sits well above 150 Mbps, per Ookla’s Global Index. My rule of thumb:
- Good cafe Wi‑Fi: 20–50 Mbps. Bring a backup hotspot for calls.
- Cowork Wi‑Fi: 100–500 Mbps. Ask for the “up” speed if you upload a lot.
- Backup options: Airalo eSIM (flexible data), Sakura Mobile, NINJA WiFi (unlimited pocket Wi‑Fi). Budget 3,000–4,000 JPY for 20–30GB eSIM, or 7,000–12,000 JPY/month for unlimited pocket Wi‑Fi.
Coworking prices: day passes 1,500–3,500 JPY; hot desk monthly 15,000–40,000 JPY (regional cities on the low end, Tokyo central on the high end). Ask about phone booths and after‑hours access if you sync with Europe or the US.
Transport that saves money—without thinking about it
- IC cards: Use Suica/PASMO (Tokyo area) and ICOCA (Kansai) on trains, subways, buses, and convenience stores. Mobile Suica/PASMO works with many foreign cards—set once, forget forever.
- Commuter pass (teikiken): If you ride the same route daily, a monthly pass often pays for itself around 15–20 rides. Typical ranges: ~5,000–12,000 JPY/month depending on distance. You can usually buy with passport ID at major stations.
- Bike share: Docomo Bike Share runs in many cities; monthly plans start around 2,200 JPY and make short hops faster than subways.
- Intercity hops: LCCs like Peach, Jetstar Japan, and Skymark often beat the train for Okinawa/Hokkaido; expect 4,000–12,000 JPY on sale.
Culture and work rhythm
Cafe etiquette that keeps you welcome
- Order first, then open the laptop. Many spots post “PC seats” or “no‑PC times”—respect the signs.
- Keep calls to a minimum. If you must, use a hallway, a Telecube, or step outside. Headsets help, but quiet is king.
- Outlets aren’t guaranteed. Carry a small power strip; it’s polite and turns you into an instant friend.
- No tipping. Clear your tray; trash is sorted (burnable, plastic, bottles/cans).
Apartment realities
- Quiet hours: roughly 10pm–7am. Keep phone calls soft; step into building common areas if needed.
- Trash sorting is real. Your building will have a schedule—snap a pic of the chart on day one.
Meeting time math without the headache
- US West Coast: Good call window is ~8–11am JST for their afternoon, or 7–11pm JST for their morning. I often split days: deep work 7–11am, calls 8–11pm, long walk and dinner in between.
- Europe: Sweet spot is 4–8pm JST (morning in London/Berlin). Easy on sleep.
- APAC: Australia and Singapore line up with your day—stack meetings mid‑morning.
- Tools: World Time Buddy and Google Calendar’s multi‑time‑zone view save you from 3am surprises.
Work‑life rhythm that sticks
- Block your weeks: Two days for heavy calls, two for deep work, one flexible “city day.” I book museums and long lunches on the flexible day—no guilt, no burnout.
- Use trains as focus pods: Shinkansen seats are quiet, stable Wi‑Fi is rolling out, and two hours Tokyo↔Osaka can produce a day’s worth of writing.
- Seasonal nudges: Sapporo in summer (cooler, cheaper), Tokyo/Osaka in spring or autumn (parks + festivals), Okinawa in late spring before typhoons.
- Find your people: English‑friendly meetups live on Meetup, Doorkeeper, and Peatix. Search “cowork,” “founder,” or your stack.
Quick reality check: if your work is call‑heavy with Europe/US, Tokyo and Osaka win on phone booths and late‑night transit. If you want calm, Fukuoka and Sapporo are focus machines. If sunlight fuels you and you can run async, Okinawa changes the way your week feels.
Got burning questions like “Can I take a quick gig from a Japanese client while I’m here?” or “Exactly how many days can I stay?” I’ve got those clear and short—ready for you next.
Quick‑answer FAQ (the stuff everyone asks)

How long can I stay?
Up to six months in one stretch. There’s no in‑country extension on this status. After you use that time, you’ll need to be outside Japan for roughly six months before applying again. Think of it as one clean block: arrive, enjoy six months, then take a break before your next round.
How do I count my days?
From the first full day after arrival. Example: arrive March 1 → day 1 is March 2. That’s how immigration officers commonly explain it, and it matches how short‑stay periods are usually counted worldwide. Your landing permission will show your “until” date—treat that as your hard stop. I always book my flight a couple of days before that to avoid flight hiccups turning into an overstay.
What’s the income requirement?
At least 10,000,000 JPY per year (roughly USD 65k–70k depending on exchange rates). You’ll want solid proof, not just a spreadsheet you made last night. What tends to work well:
- Tax returns or official tax assessments from the last year
- Employer letter confirming your role, salary, and remote status
- Client contracts/invoices for freelancers, ideally covering the past 6–12 months
- Bank statements showing income hitting your account
Pro tip: submit more than one type of proof. When I’ve done this for other visas, redundancy reduces back‑and‑forth and speeds up approvals.
Can I freelance for a Japanese client?
No. The rule is clear: you can work only for employers or clients outside Japan while on this status. That means no one‑off invoice to a Tokyo startup, no Japan‑payrolled gigs, no “just a quick side project.” Keep your revenue foreign‑sourced and clean.
Can I switch to another status from inside Japan?
Don’t assume a quick switch. You’ll need to meet that status’s normal requirements—typically a job offer in Japan and a Certificate of Eligibility (CoE) issued before a change is granted. It’s possible in some cases, but it’s not automatic or guaranteed. If switching is your goal, plan ahead with the employer and confirm timelines with your local immigration office.
Want a plug‑and‑play, week‑by‑week plan to get this approved without panic? I’ve mapped the whole process into a 6‑week timeline—ready to see exactly what to do and when in the next section?
Your 6‑week application game plan and final checklist
You don’t need a mountain of admin to get this done—just a clean plan. Here’s the exact timeline I use so you can go from idea to approved without scrambling, plus a final checklist you can screenshot and take to your appointment.
30–60 days out
- Confirm you’re eligible and that your passport is valid at least 6 months past your planned entry, with 2+ blank pages. Check your situation against your local mission’s page: find your Japanese Embassy/Consulate, and keep an eye on official updates from the Immigration Services Agency: isa.go.jp.
- Line up income proof that clearly clears 10,000,000 JPY/year. Typical stack:
- Last year’s tax return (or year-to-date pay summary if you changed roles)
- Employer letter or active contracts confirming remote work and compensation
- Recent bank statements (3–6 months) matching the income trail
Tip: If your income is in another currency, include a one-page conversion printout with date and rate. Keep numbers simple and legible.
- Buy qualifying private health insurance covering your entire stay, including medical treatment and repatriation. Ask the insurer for a certificate naming each traveler, dates of coverage in Japan, and coverage details on one page.
- Gather identity and travel docs:
- Passport bio page (copy) + recent photo (check your consulate’s size; many accept 45×35 mm)
- Simple itinerary (cities/dates) and a cancellable first stay (7–14 nights)
- Return/onward flight that’s refundable or flexible—don’t lock yourself in too soon
- Book your consulate appointment. Some posts are quick; others run 2–3 weeks out. Many list processing as 5–15 business days; plan buffers around that.
- If you’re bringing family: collect marriage and birth certificates, plus translations if not in English/Japanese. Some missions like apostilles—email them early to confirm.
- Name consistency check: your name should match across passport, employer letters, insurance, and bank documents (middle names matter).
- Create a cloud folder with PDFs of everything. Also keep one offline copy on your phone in case you’re asked at the window or at arrival.
Pro tip: I block one “admin day” per week during this window. It keeps momentum without eating your work hours.
2–3 weeks out
- Submit your application in person (most posts require it). Bring originals and one set of copies. Be ready to leave your passport while they process.
- Tighten your first‑month plan:
- Book a flexible apartment or monthly rental you can extend if needed
- Shortlist 2–3 coworking spaces with day passes and solid weekday hours
- Pick an eSIM or SIM plan (20–50 GB typically runs 2,000–4,000 JPY/month)
- Draft a one‑pager “work status” note for your folder: who pays you (outside Japan), what you do, and that your work is fully remote. It’s not always required—but it makes answers effortless if asked.
- Set calendar alerts for:
- Expected pickup date (processing often lands inside 1–3 weeks)
- Insurance start date (make sure it aligns with your arrival)
- Your planned departure—book with a buffer to avoid overstay stress
- Money logistics:
- Bring a no‑FX‑fee card and set up a multicurrency account for JPY
- Know where to withdraw cash on arrival (Japan Post Bank ATMs are reliable: JP Bank ATM info)
- Add Suica or PASMO to your phone wallet for trains/buses and most kiosks
- Travel route sanity check: arriving late at night? Book the airport train or bus ahead. Save the terminal Wi‑Fi page and directions in your notes.
Optional: budget and first‑month setup
Here’s a quick, realistic first‑month picture I share with readers (ranges for a solo traveler):
- Rent (furnished, monthly)
- Tokyo: 150,000–250,000 JPY
- Osaka: 90,000–150,000 JPY
- Fukuoka: 70,000–120,000 JPY
- Coworking: 15,000–35,000 JPY/month (day passes 1,500–3,000 JPY)
- Mobile data: 2,000–4,000 JPY (20–50 GB)
- Transport: 10,000–20,000 JPY (commuter passes can trim this if you stick to one area)
- Food: 60,000–90,000 JPY if you mix convenience-store meals, ramen/teishoku, and groceries
Connectivity is excellent—Japan consistently ranks high for mobile reliability and fast fixed broadband in global speed indexes, which is why I rarely worry about video calls even in busy neighborhoods. If your work is call‑heavy, pick housing near fiber‑connected buildings and keep a coffee shop with strong Wi‑Fi as backup.
Gotchas I see most:
- Insurance not explicitly covering the entire stay
- Income letters that say “contractor” but don’t show amounts/dates
- Names formatted differently across documents
- Tight flight timing with no buffer around visa pickup
Final checklist
- Passport (valid 6+ months, 2+ blank pages)
- Completed application form + compliant photo
- Income proof stack (tax return, employer/contract letters, recent bank statements)
- Private health insurance certificate listing Japan, coverage dates, and repatriation
- Itinerary (one page) + first accommodation (cancellable)
- Return/onward ticket (flexible/refundable if possible)
- Copies of everything (one set per applicant) + digital backups
- For family: marriage/birth certificates + translations (and apostilles if your consulate asks)
- Consulate appointment confirmation + fee (check payment method—some are cash only)
- Plan B buffer (a few extra days on either side of your intended entry/exit)
Wrap‑up
Keep it simple: clear income, solid insurance, tidy documents, and a little buffer. Do that, follow your timeline, and your approval should feel boring—in the best way. I’ll keep tracking changes and posting updates on travelsites.com/blog, so bookmark it and travel smart.