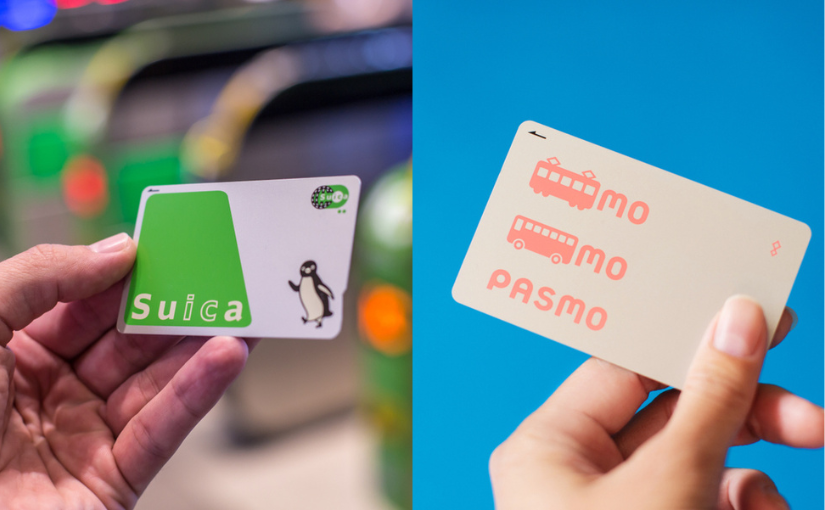
Suica & PASMO are back: easiest ways for tourists to get IC cards
Have you ever stumbled off a long‑haul flight into Tokyo, half asleep, and then found yourself frozen in front of a ticket machine, trying to decode a fare chart that looks like a subway-themed spiderweb?
If you haven’t yet, trust me: that’s not how you want to spend your first hour in Japan.
An IC card like Suica or PASMO turns that whole mess into one clean motion: tap in, tap out, forget about fares. One card for trains, subways, buses, vending machines, convenience stores – even some coin lockers and taxis. It’s the closest thing Japan has to a “travel easy mode.”
For a couple of years, though, that easy mode basically broke. The semiconductor shortage hit, physical IC cards were cut back or paused, and tourists who thought they’d “just grab a Suica at the station” found… nothing. Or worse, a confusing mix of partial options: tourist cards here, mobile-only there, regular cards “temporarily suspended.”
The good news: in 2025, Suica and PASMO are finally coming back in a real way. But the bad news is that online info is still a mess. Some blogs say cards are “sold out,” others talk only about Welcome Suica, others shout “just use your phone” as if that magically works for everyone.
So let’s clear the fog.
The headaches tourists still have without IC cards
If you’re wondering whether an IC card is worth the effort, picture this.
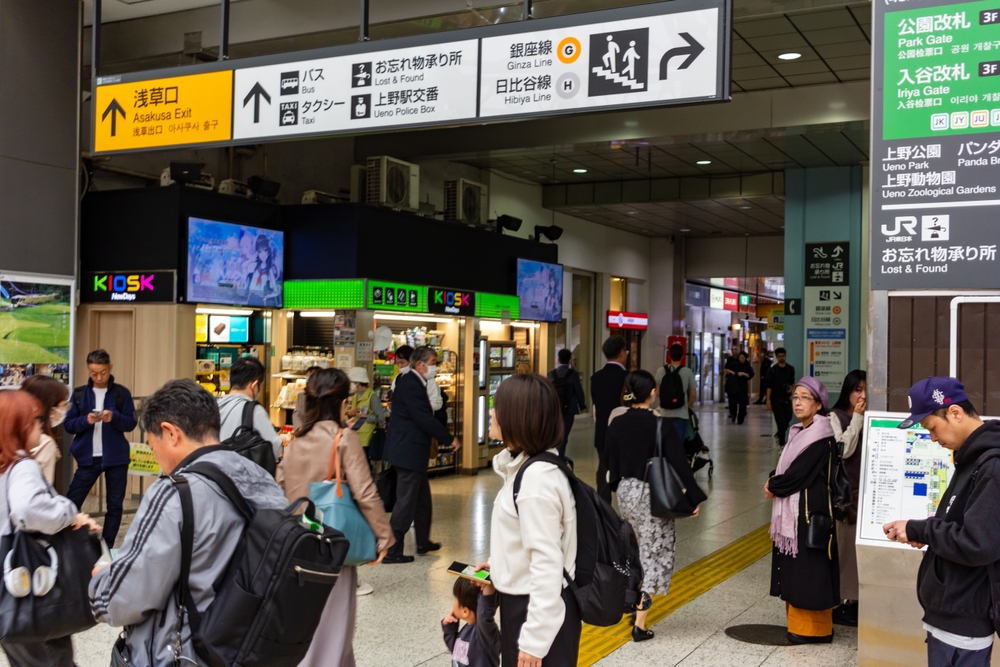
You’re staying near Shinjuku. Today’s plan: Meiji Jingu in the morning, Harajuku for a crepe, Shibuya Crossing photos, then maybe Tokyo Tower at night. That’s already 6–8 train rides in a day, and here’s what it looks like without an IC card:
- You stand in front of the ticket machine before every single ride, trying to find your destination on a crowded map, usually in tiny print.
- You guess the fare, buy a paper ticket, then realize you underpaid when the gate beeps angrily at you at the other end.
- You shuffle over to a “Fare Adjustment” machine, with your backpack and possibly kids in tow, while locals breeze past with a single tap.
- You keep building a little collection of paper tickets in your pocket, all worth exactly nothing once you’ve used them.
On a simple two‑station hop this might feel like a “fun local experience.” By day three of a multi-city trip, it turns into friction. A lot of it.
Now multiply that by:
- Airport transfers
- Day trips (Yokohama, Kamakura, Nara, Kobe…)
- Random buses when it’s raining and you don’t feel like walking
Every time you face a machine, you’re dealing with:
- Time – lines at busy stations, especially around rush hours and weekends.
- Cognitive load – foreign language, unfamiliar place names, different rail companies.
- Stress – “Is this the right ticket? Is this the right platform?”
There’s a reason transport researchers often talk about the “hidden cost” of ticket complexity. One European study on public transport usability found that perceived difficulty using ticket systems was one of the biggest factors that made tourists feel stressed in new cities – more than crowding, and sometimes even more than delays. Japan’s network is brilliant, but it’s also dense and layered. Anything that removes friction is worth a lot.
An IC card essentially erases all that. You don’t buy a ticket for each ride. You load money once in a while, then:
- Tap the reader at the gate to enter.
- Tap again to exit.
- Let the system figure out the exact fare in the background.
Same card for JR trains, subways, and many private lines. Same card to grab a bottled tea from the vending machine at 7:40, when you realize you haven’t had water all day.
Without an IC card, you’re constantly doing admin. With one, you’re just traveling.
The shortage hangover: how 2023–24 made this worse
Now layer in what happened during the semiconductor shortage.
In 2023, sales of physical Suica and PASMO cards were restricted or suspended in a lot of places. Visitors would land at Narita or Haneda, wander over to the machines expecting that classic green Suica option, and find:
- “Sale of new Suica cards temporarily suspended” notices.
- Only special tourist cards like Welcome Suica – and sometimes even those selling out at peak times.
- Staff politely telling them to use mobile Suica instead… on phones and cards that didn’t always cooperate.
Reddit threads at the time were full of stories like:
“We arrived in Tokyo with instructions from three blogs to just buy Suica at the airport. Got there – sold out. The staff told us to download mobile Suica, but my phone wouldn’t let me change region and my card was rejected. Ended up using paper tickets for the entire trip.”
Or:
“PASMO cards gone, only PASMO Passport if you could find the right counter. We wasted almost an hour just trying to figure out how to ride the train into the city.”
Even after things started coming back in 2024, the confusion stuck. A lot of older articles were never updated, and Google started showing a mix of totally contradictory advice:
- “Suica is sold out everywhere, don’t bother.”
- “Only Welcome Suica is available for foreigners.”
- “Just add Suica to your iPhone, no need for a physical card.”
For a first‑time visitor planning a trip, that creates analysis paralysis. You’re already thinking about JR Pass vs no JR Pass, pocket Wi‑Fi vs eSIM, cash vs card, and now you have to untangle which IC card even exists?
In 2025, the actual situation is much better than those panicked posts suggest – but the online noise hasn’t caught up. That’s why I wanted to sit down and write a clear, traveler‑first guide based on what’s really available now, not what was true at the worst moment of the shortage.
What this guide will actually sort out for you
I’m not trying to turn you into a rail nerd. You don’t need to memorize every IC brand under the sun. What you probably want is something much simpler, like:
- “I’m landing in Tokyo in 2025. Exactly what should I do about IC cards?”
That’s the job of this guide. I’m going to answer, in plain language:
- Which IC card makes the most sense for your trip length – whether you’re here for 5 days or 5 weeks.
- Exactly where and how to get a physical card in 2025 – no vague “just at the station” stuff. I’ll talk airports, specific counters, and the type of machines to look for.
- When using your phone is actually smarter than a plastic card – and when it’s a frustration trap.
- What has changed since the shortage – and how that affects you, right now, as a foreign visitor.
Everything here is shaped by how real travelers move:
- Families juggling suitcases and kids.
- Couples trying to squeeze three cities into 10 days.
- Solo travelers who’d rather be eating ramen than reading station maps.
You won’t find technical jargon or corporate slogans. I’m not here to sell you on any one company. I’m here to help you spend less time thinking about tickets and more time actually enjoying Japan.
Who this is for (and who can safely skip it)
Before we go further, let me be clear about who will actually benefit from reading this – and who can close the tab and go look at food photos instead.
This is for you if:
- You’re a first‑timer doing the classic Tokyo–Kyoto–Osaka route on a 1–3 week trip, and you want a stress‑free way to handle trains, subways, and buses.
- You’re a repeat visitor who used Suica/PASMO years ago and now keeps hearing that cards “disappeared” or “changed” because of the shortage.
- You’re organizing a trip for a family or group and you want one simple transport setup that everyone understands, including the less tech‑savvy people in your crew.
You probably don’t need to geek out on all the details here if:
- You’re on a fully guided tour where the bus picks you up, drops you off, and your guide hands you group tickets whenever needed.
- You’re an ultra‑budget backpacker who genuinely plans to walk or cycle pretty much everywhere, hopping on the train only a handful of times.
Even in those cases, having a basic sense of IC cards won’t hurt. But if you’re not going to be using public transport much, you don’t need to optimize this part of your trip. For most visitors though – especially anyone using Tokyo’s rail network daily – getting IC cards right up front will save you a lot of tiny headaches.
A quick 2025 snapshot: what’s actually back now
Let’s fast‑forward to where we are today, because this is what most people really care about.
In 2025:
- Regular Suica and PASMO cards are gradually back on sale. The key phrase you may see in news updates is “unregistered adult cards.” For you, as a short‑term visitor, that’s usually the sweet spot: simple, anonymous, easy to grab when you see them.
- Tourist‑focused cards like Welcome Suica and PASMO Passport still exist. They’re designed for visitors, often with no deposit to refund and limited‑time validity. But they’re not sold absolutely everywhere, so knowing which airports and counters have them matters.
- Phone‑based IC cards are more reliable than ever for a big chunk of travelers. If you’ve got a fairly recent iPhone or compatible Android, there’s a good chance you can add Suica or PASMO to your wallet app and skip plastic altogether – with some caveats I’ll talk about later.
The bottom line: Japan’s “tap and go” system is back for 2025 visitors. The trick now is not “if” you can get an IC card – it’s which route is easiest for you, personally, based on where you land and how you like to travel.
In the next part, I’m going to strip away the brand confusion and explain, in simple terms, what IC cards are, what changed during the shortage, and what that means for you now. Once you understand that foundation, picking your best option becomes surprisingly easy.
So, want to go from “Suica vs PASMO vs ICOCA vs what even is all this?” to “I know exactly which card I’ll grab the moment I land”? Let’s take a look at that next.
IC cards in Japan: what they are and what actually changed
Think of IC cards in Japan as your “transport wallet” on a single piece of plastic (or your phone): you load money once, tap everywhere, and stop thinking about tickets.
Technically, IC cards are prepaid, rechargeable smart cards that use contactless tech (FeliCa) to pay for:
- Trains, subways, and many buses
- Vending machines and station kiosks
- Convenience stores like 7‑Eleven, FamilyMart, Lawson
- Coin lockers, some taxis, fast‑food chains, and cafes
The famous names you’ll see are:
- Suica – JR East’s card, centered on Tokyo and the Tohoku region
- PASMO – Used by private railways and subways in the Tokyo area
- ICOCA – JR West’s card, based around Osaka, Kyoto, Kobe (Kansai)
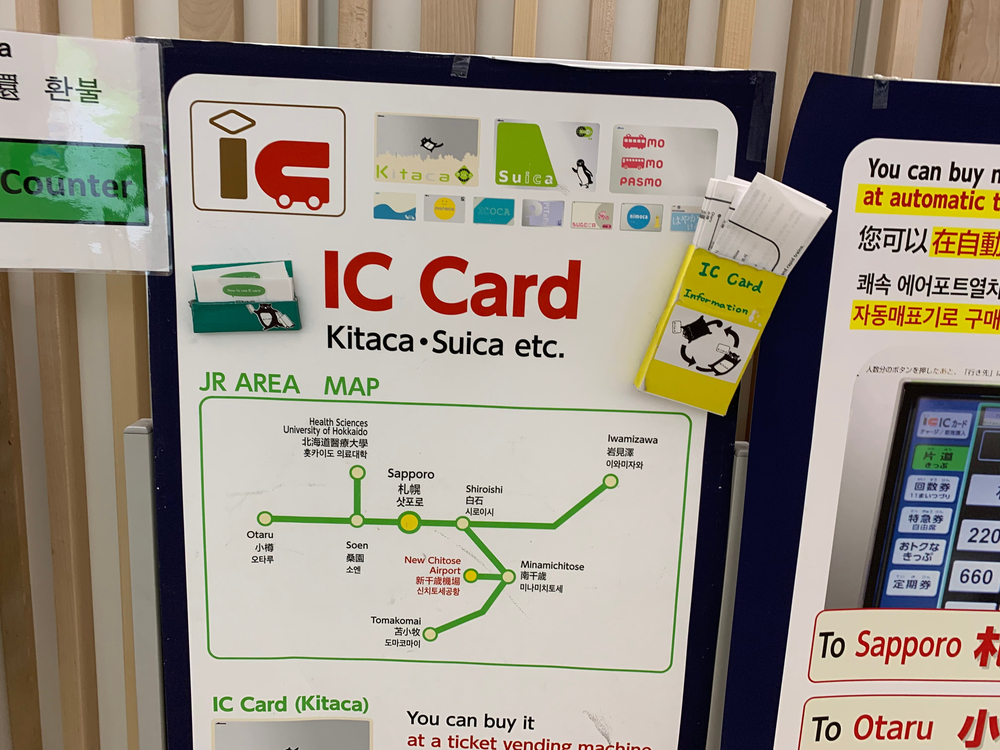
- Other regional cards like TOICA (Nagoya), Kitaca (Hokkaido), SUGOCA (Kyushu), and a few more
For locals, the brand can matter a bit. For you as a visitor, these cards are like different bank logos on the same type of debit card. They all tap in, tap out, and cover the overwhelming majority of city transport in 2025.
One study by Japan’s Ministry of Land, Infrastructure, Transport and Tourism estimated that IC cards are used for well over half of all rail trips in major urban areas. You can feel that when you stand at the ticket gates during rush hour: almost everyone is just tapping and walking.
“The less you think about logistics, the more you remember the journey.”
IC cards are exactly that kind of mental shortcut. But to pick the best one for your trip, it helps to understand how they differ and what actually went wrong during the shortage.
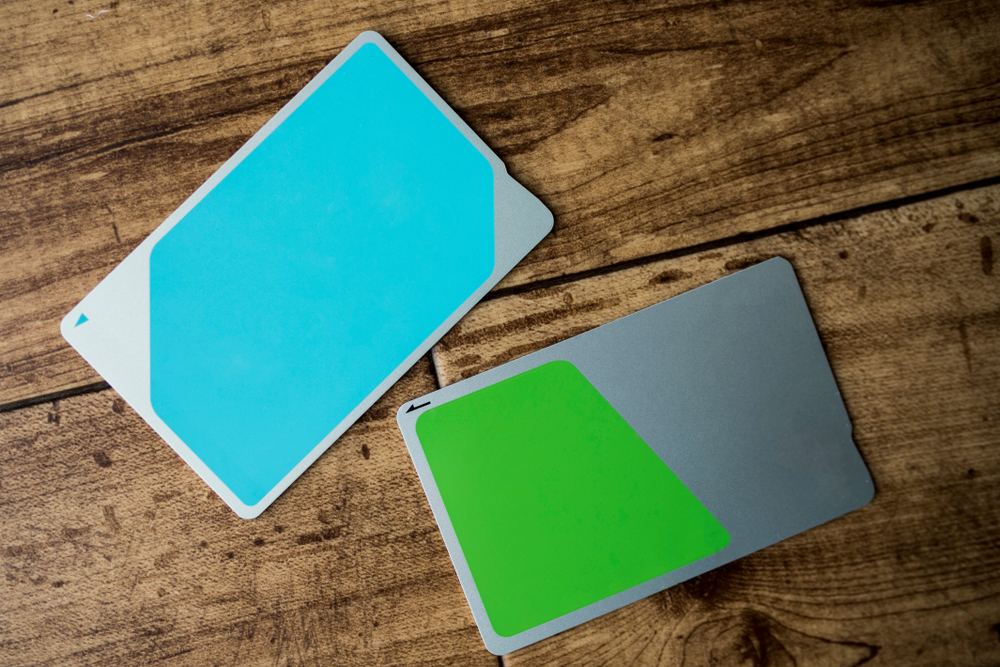
A quick refresher: Suica vs PASMO vs the rest
In Tokyo, you’ll mostly see two logos everywhere: Suica (the penguin) and PASMO (the pink rectangle). Here’s the simple truth:
- Suica is issued by JR East (the big JR operator in eastern Japan).
- PASMO is issued by private railways and subway companies in the Tokyo region.
Functionally, for you, they are almost identical:
- Both work on JR, subways, and most private lines in Greater Tokyo.
- Both can be used in convenience stores, vending machines, and many shops.
- Both can be used all across other major cities that accept IC cards.
If you tap Suica on a PASMO gate or PASMO on a Suica gate, it just works. No one cares which one you have at the gate, including the machine.
Outside Tokyo, you’ll see cards like:
- ICOCA – Kansai (Osaka, Kyoto, Kobe, Hiroshima)
- TOICA – Around Nagoya
- Kitaca – Sapporo and parts of Hokkaido
- SUGOCA, nimoca, Hayakaken – Kyushu and Fukuoka region
Since the nationwide “mutual use” agreement, these cards mostly work in each other’s zones for basic taps at gates and shops. So if you arrive in Tokyo, get a Suica, then head to Osaka, you can still use your Suica to get around Osaka’s trains and subways in 2025.
That’s why, from a tourist’s perspective, the card’s brand is rarely the deciding factor. What really matters is:
- Which card you can actually get quickly when you land
- Where you’re spending most of your time (Tokyo, Kansai, somewhere else)
- Whether you want something plastic, on your phone, or a tourist‑only design
The catch is that, for a while, “just get a Suica at the airport” stopped being a sure thing.
What actually happened with the IC card shortage
In 2023, a global semiconductor shortage hit Japan’s IC card system hard. The tiny chips inside each Suica and PASMO are not something you can simply swap out. When suppliers struggled, the card issuers had to protect stock for locals who use these cards every day to commute.
That led to a series of decisions that stunned a lot of travelers:
- Sales of new physical Suica and PASMO cards were restricted or suspended at many ticket machines and counters.
- Announcements went out in mid‑2023 saying that sales of standard, anonymous cards were suspended “for the time being.”
- In many cases, only:
- Mobile Suica or Mobile PASMO (phone‑based), or
- Special tourist cards like Welcome Suica or PASMO Passport
were still available in limited numbers and locations.
If you spent time on Reddit or travel forums then, you probably remember the chaos:
- One post saying “Suica is totally sold out in Tokyo, use your phone.”
- Another saying “Only Welcome Suica is available at Narita, regular cards are gone.”
- Someone else reporting “Managed to get PASMO at one machine in Shinjuku, nowhere else.”
People arrived with guides from 2019 telling them to grab Suica at the airport, only to find:
- Ticket machines with the IC purchase button greyed out
- Staff explaining (in limited English) that sales of regular cards had stopped
- Signs directing them to use mobile cards instead, which didn’t always work on foreign phones
It wasn’t just anecdotal. JR East officially announced the suspension of most unregistered physical Suica cards in 2023 because of the chip situation, and PASMO followed a similar path. A lot of travelers fell into “IC card limbo” where:
- The internet said “just get a card, it’s easy.”
- The reality was “only some types, in some places, if you’re lucky.”
The good news is that production has been ramping back up. In late 2024 and into 2025, JR East and PASMO operators started quietly bringing back unregistered Suica and PASMO cards again, especially in major hubs and via dedicated IC card machines. Public announcements around March 1 about sales resuming for certain card types were the turning point everyone had been waiting for.
So does that mean everything is exactly like pre‑2020 again? Not quite.
Where things stand in 2025
By 2025, the full-blown emergency is over, but there are still some wrinkles you need to know about before you land.
From recent guides like Rakuten Travel’s 2025 Suica overview and on‑the‑ground reports, here’s the situation in plain language:
- There is no longer a total blackout on cards. Unregistered, adult Suica and PASMO have made a comeback at many major JR East and PASMO network stations.
- Availability is not perfectly uniform. Some small or suburban stations might still not sell new cards, or machines may run out temporarily.
- Tourist‑only cards still exist, but they’re picky about where they’re sold.
- Welcome Suica is focused mainly on JR East Travel Service Centers and specific machines at Narita and Haneda.
- PASMO Passport tends to appear at airport stations, major tourist hubs, and visitor centers, often on a limited basis.
- Phone‑based cards are more stable than they were. Mobile Suica and PASMO have matured, especially for iPhone users, and can be a very smooth option if your device and payment cards cooperate.
What this means for you as a traveler in 2025:
- You no longer need to panic that “IC cards are gone.” They’re back.
- You do still need to be a little strategic about:
- Which card you aim for (tourist card vs regular vs mobile)
- Where you try to buy it (airport vs city station)
- How long you’re staying (short trip vs several weeks or more)
The upside of all this? You actually have choices again. You’re not forced into a mobile setup you don’t want, and you’re not stuck juggling paper tickets for your whole stay.
The real question now is: with everything finally back on the table, which IC card makes the most sense for your kind of trip in 2025 – and how do you pick quickly without getting lost in details?
I’ll walk you through that next, starting with a super simple recommendation for most visitors and then a more nuanced breakdown for different travel styles. Curious which card I’d grab if I were landing tomorrow with a 2‑week Tokyo–Kyoto itinerary?
Which IC card is best for foreigners in 2025? (short answer vs detailed answer)
If you just want the quick answer and don’t care about the nuances:
For most visitors in 2025, the best “no-brainer” choice is a tourist IC card (Welcome Suica or PASMO Passport) from the airport, or a regular Suica/PASMO if that’s what you find first.
That’s the short version.
The honest version? The “best” IC card depends on three things:
- Where you land
- How long you’re staying
- How much tech and admin hassle you’re willing to accept
Let’s break that down so you don’t spend your first night in Tokyo doom‑scrolling Reddit threads about Suica.
The simple recommendation for most tourists
If you’re like most readers on my blog, your plan looks something like this:
- 1–3 weeks in Japan
- Base in Tokyo, with maybe a trip to Kyoto/Osaka or Hakone/Nikko
- Landing at Narita or Haneda
In that case, here’s the setup that will keep things painless.
1. Aim for a tourist IC card first — Welcome Suica or PASMO Passport — if it’s easy to get where you arrive.
Why these are so nice for short trips:
- No deposit to refund – you don’t have to line up at the end of your trip to claw back 500 yen.
- Simple rules – they’re built for visitors, with clear English explanations and validity periods.
- Souvenir factor – they usually have cute or stylish designs you’ll actually want to keep.
Imagine this: you land at Haneda around 7 p.m., body clock screaming 3 a.m., humidity hitting you in the face when the airport doors open. You really don’t want to be calculating fares to Shinagawa while juggling luggage and trying to remember which line is the Keikyu and which is the Monorail. With a Welcome Suica or PASMO Passport, the mental script becomes:
“Tap in. Get on train. Tap out. Eat.”
That’s it.
2. If the tourist cards aren’t available, just grab a regular Suica or PASMO (unregistered adult card) whenever you first see it.
In 2025, unregistered Suica and PASMO cards have made a comeback at many stations and machines. For a typical trip, the practical difference between a tourist card and a regular unregistered card is tiny:
- Regular cards usually have a 500 yen refundable deposit
- Tourist cards often have a time limit (e.g. 28 days) but no deposit
Everything else — the tap‑and‑go experience on trains, subways, buses, and at shops — feels the same.
From a traveler perspective, the real question isn’t “Suica or PASMO?” It’s simply:
“What’s easiest to get my hands on right now, in this airport or station?”
That’s the one you want.
When a mobile IC card is the best choice
Now, if you’re the kind of person who pays for coffee with your phone and hasn’t seen a physical wallet in years, the smartest move might be to skip plastic completely.
Mobile Suica and Mobile PASMO let your phone act as your IC card. And when it works smoothly, it feels magical:
- You tap your phone at the gate, even if it’s in your pocket or bag.
- You recharge instantly with a credit card, without hunting for cash or machines.
- You never worry about losing a little plastic card under a hostel bunk bed.
For many travelers, that’s a big deal. A 2023 Mastercard survey found that over 60% of travelers aged 25–44 prefer to use digital wallets abroad whenever possible, mostly because it feels safer and more convenient than carrying cash. Japan’s IC ecosystem plugs right into that habit if your phone plays nice.
When mobile is likely the best option:
- You’re using a recent iPhone and comfortable with Apple Pay
- You have an Android phone with NFC and don’t mind tweaking region or language settings
- You want to top up from your credit card instead of carrying lots of yen in cash
But I’d be lying if I said it’s friction‑free for everyone.
Potential headaches you should know about:
- Setup can be Japanese‑only in parts of the app or wallet interface, especially on Android.
- Some foreign credit cards are refused for top‑ups, depending on the issuer and region.
- Your phone’s region settings sometimes need to be switched to Japan to add Suica or PASMO.
I’ve had readers message me things like:
“I spent 40 minutes at my hotel in Shinjuku trying to get Mobile Suica to accept my credit card, then finally gave up and bought a physical PASMO. If you’re not techy, don’t overcomplicate it.”
So here’s how I frame it:
- If you like tinkering with your phone and don’t mind a 10–20 minute setup session your first night, mobile IC can be fantastic.
- If you’re already anxious about roaming, eSIMs, and QR codes, a simple plastic card will keep your blood pressure down.
Personally, I use mobile when I’m solo and have time to experiment, and I still push friends and family toward a physical card if they’re landing late or traveling with kids. It’s about reducing the number of things that can go wrong on day one.
Special situations: long stays, JR Pass users, Kansai‑focused trips
Not everyone fits the “2 weeks in Tokyo with a side of Kyoto” mold. If your plans are a little different, your ideal setup shifts too.
1. Long‑term stays (more than a month)
If you’re staying in Japan for over a month — maybe a working holiday, language school, or extended remote work trip — the game changes slightly.
- It’s usually worth considering a registered Suica or PASMO.
- Registered cards are linked to your name and details, so you might be able to recover the balance if you lose them.
There’s a bit more admin involved to set it up, and staff may ask for basic information, but if you’re riding trains daily for months, the extra security is comforting. Think of it as travel insurance for your transport budget.
One long‑stay reader told me she lost her Suica in week three of language school in Shibuya; because she’d registered the card, staff helped transfer most of her balance to a new one. Without that, she’d have been out several thousand yen in commutes.
2. JR Pass users
If you’re using a Japan Rail Pass, you might assume you can skip IC cards entirely. Not quite.
The JR Pass is amazing value for long‑distance JR travel, but it doesn’t cover:
- Most subways (Tokyo Metro, Toei, Osaka Metro, etc.)
- Private railways (Keio, Odakyu, Hankyu, etc.)
- Many city buses and trams
This is where an IC card remains your quiet, loyal sidekick. The easiest combo I’ve seen for JR Pass travelers is:
- Use your JR Pass for long hops and JR lines
- Use a Suica/PASMO/ICOCA for everything else — especially subways and buses
This way, you’re not fumbling with cash or paper tickets every time you hop from JR to a metro line in Tokyo, or when you jump on a non‑JR train to get to a specific neighborhood.
3. Kansai‑heavy itineraries (Osaka, Kyoto, Kobe)
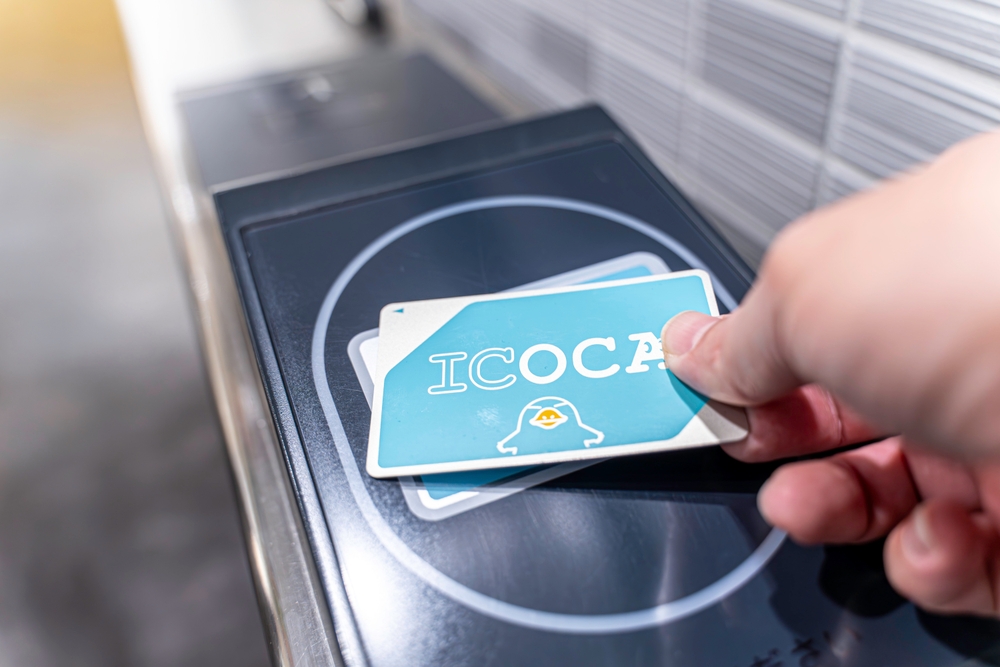
If you’re landing in Osaka (Kansai Airport) or spending most of your time in the Kansai region, your best friend is usually ICOCA.
ICOCA is the Kansai equivalent of Suica/PASMO, and for a visitor it works in exactly the way you’d expect:
- Tap in and out on JR West lines around Osaka, Kyoto, Kobe
- Accepted across most major cities where Suica/PASMO work too
- Usable in many shops, vending machines, and convenience stores
One practical advantage: if you’re doing something like:
- Osaka → Kyoto → Nara → Kobe → Hiroshima → back to Osaka
you can often just stick with ICOCA the whole way for local transport. In my experience and from reader feedback, most people forget which “brand” they even have after day two — they just know that tapping works everywhere they go.
So the rule of thumb becomes:
- Landing in Tokyo area? → Look for Welcome Suica, PASMO Passport, or regular Suica/PASMO.
- Landing in Kansai? → Grab ICOCA and don’t overthink it.
At the end of the day, your “best” card is the one that:
- You can get immediately when you arrive
- Matches your comfort level with tech and admin stuff
- Won’t give you extra chores on your last day when you’re racing to the airport
Or, to put it another way:
“The perfect IC card is the one you stop thinking about by day two.”
Now, knowing that tourist cards are often the easiest and most stress‑free choice, the obvious next question is: where exactly do you find Welcome Suica and PASMO Passport in 2025, and how fast do you need to grab them before they’re gone for the day?
That’s where things get interesting — and very specific to Narita, Haneda, and a handful of stations. Let’s walk through exactly where to stand, which counters to look for, and how to walk out of the airport already “tapped in” to Japan.
How to get a Welcome Suica or PASMO Passport in 2025
Where you can buy Welcome Suica now
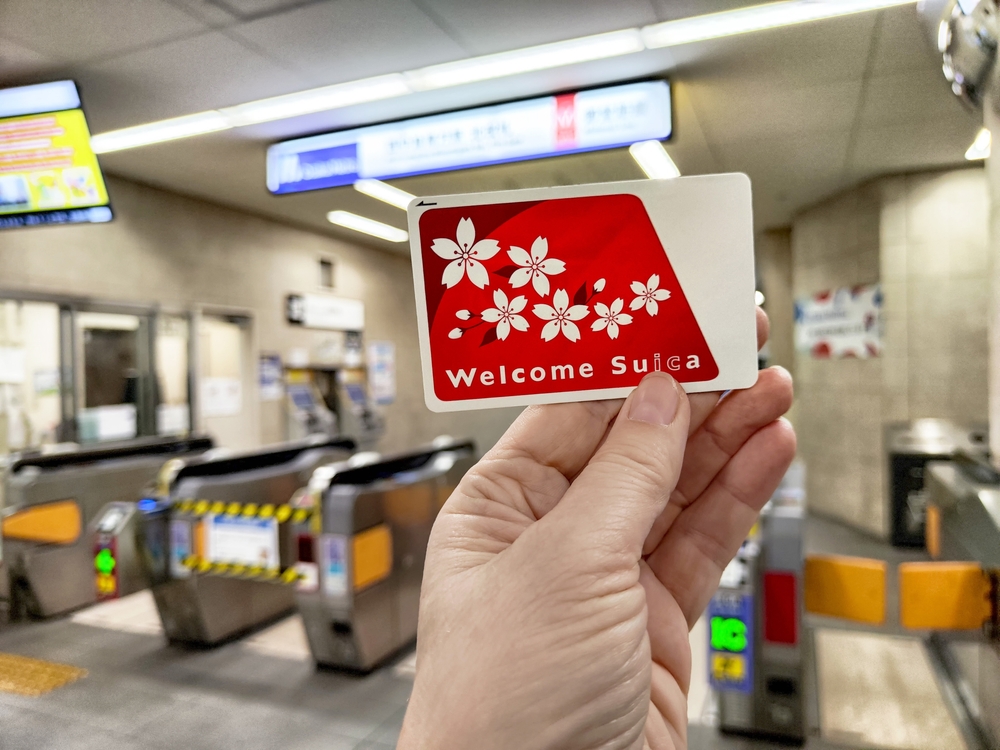
If your plane is landing at Narita or Haneda, you’re in the sweet spot. Welcome Suica is one of the easiest “set it and forget it” options for visitors in 2025 – but only if you grab it in the right place, at the right time.
As of early 2025, Welcome Suica is officially sold at:
- JR East Travel Service Centers at:
- Narita Airport Terminal 1
- Narita Airport Terminal 2–3
- Haneda Airport Terminal 3 (international)
- Designated IC card vending machines at Narita Airport
- IC card vending machines in Haneda Airport Terminal 3 arrivals
That’s it. Not Shinjuku, not Shibuya, not random JR stations in the city. This is the catch many travelers miss – they assume they can “just get it later” and then find out later doesn’t exist.
In practice, here’s how I recommend you handle it:
- At Narita: after you clear customs, follow the signs to the train area (JR lines). Before buying any train ticket into Tokyo, look for:
- Green “JR EAST Travel Service Center” signs, or
- Ticket machines with a big Suica logo and “Welcome Suica” shown on the screen
- At Haneda (Terminal 3): when you enter the arrivals hall, you’ll see the train access area down the escalators. Look for:
- The JR East service counter with English-speaking staff, or
- IC card vending machines near the train ticket area that explicitly show “Welcome Suica”
Most travelers I talk to who were happiest with their transport in Tokyo did one simple thing: made getting their Welcome Suica the very first “task” after landing.
Imagine this: your flight gets in at 6:30 a.m. at Haneda. You’re running on airplane coffee and two hours of broken sleep. Instead of battling a fare chart in a language you don’t read, you tap the Welcome Suica button on the machine, pay once, and walk out ready to:
- Tap into the monorail or train into Tokyo
- Pay for your first onigiri and iced coffee at the convenience store
- Use the same card on the subway to your hotel
In a 2024 JNTO survey, “confusing ticket systems” was one of the top frustrations for first-time visitors in Japan. You can sidestep that entirely just by planning 10 extra minutes at the airport.
“Travel is the only thing you buy that makes you richer – but the less time you spend at ticket machines, the richer it feels.”
A couple of quick, real-world tips from the ground:
- Have some cash ready. Most machines take cards, but cash is still the most foolproof way to top up in Japan.
- Look for the English language button. On the vending machine screen it’s usually in the top right. Once you tap that, the process is almost impossible to mess up.
- Buy enough balance for the first few days. For central Tokyo, I usually suggest starting with 3,000–5,000 yen on the card so you’re not topping up immediately again.
If you’re landing at Narita or Haneda and your trip is under a month, Welcome Suica is basically your “easy mode” setting. But it’s not the only tourist IC card in town.
PASMO Passport: where and why you might want it
Think of PASMO Passport as Welcome Suica’s playful cousin. It’s also made for tourists, it also lets you tap your way around trains, subways, and buses, but it comes with its own twist and – usually – a cuter design.
While exact sales points can change, in 2025 PASMO Passport is typically available at:
- Major stations in Tokyo on PASMO-served lines (for example, some ticket counters at:
- Keisei Ueno (useful if you arrive on the Keisei Skyliner from Narita)
- Shinjuku
- Shibuya
- Airport locations such as:
- Haneda Airport (Keikyu line counters)
- Narita Airport (Keisei and some private railway service counters)
- Tourist information centers and some large stores that partner with PASMO promotions
Because PASMO Passport is tied to specific campaigns and partners, its exact sales spots shift more than Welcome Suica. That’s why I always recommend checking the official PASMO Passport page a week or so before you fly. They list current sales locations in English.
Why might you pick PASMO Passport over Welcome Suica if you have the choice?
- Design and souvenir value. PASMO loves special character designs and limited-edition prints. If you’re traveling with kids (or you enjoy cute things yourself), this can be a fun little keepsake.
- Private rail and subway focus. In everyday use there’s almost no difference for you, but some travelers like pairing PASMO with airport routes like Keikyu (Haneda) or Keisei (Narita).
- Easy to recognize. The pink PASMO logo is bright and obvious, which sounds trivial, but when you’re half-asleep at the gate, “obvious” is your best friend.
There is one important similarity with Welcome Suica: PASMO Passport is time-limited (usually 28 days from first use). That’s great for a normal trip, but if you’re planning a long stay, you’ll want a different type of card later on.
On the plus side, in a study on urban transit usability from The University of Tokyo, simple, visual cues (colors, icons, mascots) were shown to reduce user stress significantly in crowded systems. That sounds academic, but you feel it when you’re standing in a Tokyo rush-hour station and your card is bright, simple, and you know exactly what it is.
So, if you see PASMO Passport at your arrival airport counter, and you’re staying under a month, it’s absolutely worth considering – especially if Welcome Suica lines are long or stock is low.
Pros and cons of tourist‑only IC cards
Now the real question: is a tourist-only card like Welcome Suica or PASMO Passport actually better for you than a “normal” Suica or PASMO?
Here’s the straight, no-nonsense comparison.
Why tourist cards are often the smartest choice:
- No deposit drama. Regular cards usually require a 500 yen deposit, which you can get back at specific counters if you have time. Tourist cards skip this whole process – what you pay is what you use.
- No refund hassle at the airport. If your flight is at 9:00 a.m. and you’re still finishing your ramen at 7:45, you don’t want to be queuing to get a few hundred yen back. With Welcome Suica and PASMO Passport, you simply keep the card as a souvenir when you leave.
- Tourist-focused info. The packaging and signage are in clear English (and often other languages), with simple explanations: how long it’s valid, how to recharge, what you can use it for. You don’t have to decode fine print.
- Perfect match for 1–3 week trips. Most visitors wrap up Japan within that 28-day window. You tap, recharge as needed, then stick the card in your scrapbook – done.
Where tourist cards can fall short:
- Time limit. The 28-day usage window means if you’re doing a two-month language course, staying with family long-term, or planning multiple trips in one year, a standard card (or mobile IC) makes more sense.
- Fewer purchase locations. Welcome Suica is basically “airport only” right now, and PASMO Passport has a curated list of sales spots. If you miss them at the airport and don’t hit the right stations, you might not see them again.
- Less flexibility for future trips. A regular Suica/PASMO will be waiting for you next time you come back, even years later. Tourist cards are designed for one finite stay.
If you’re a typical visitor coming for up to three weeks, landing at Narita or Haneda, the balance is heavily in favor of a tourist card. You get:
- Simple purchase process in English
- No mental load about refunds
- A clear end date that matches your trip
And if you’re anything like most travelers I hear from, that mental freedom is worth way more than any tiny savings you might squeeze out by optimizing deposits and refunds.
There is one more angle though: what if you can’t get a Welcome Suica or PASMO Passport, or you’d rather have something you can reuse forever, not just for 28 days?
That’s where the “normal” IC cards – the regular Suica and PASMO that locals use – come back into the picture. In 2025, they’re finally returning after the shortage, and they open up a different set of options and strategies.
So here’s the real fork in the road for you as a traveler:
Grab a tourist card right at the airport and never worry about refunds… or learn how to spot and buy a regular Suica/PASMO that you can keep for years and even bring back on your next trip.
Curious which stations actually sell regular cards again, how the deposit works in practice, and how not to lose a single yen when you go home?
That’s exactly what I’m going to break down next.
Getting a regular Suica or PASMO: what’s back and how to find one

For a while, “regular” Suica and PASMO cards felt like some kind of urban legend. Everyone online talked about them, but when you got to Tokyo… the machines were sold out, the counters shook their heads, and the only answer was “use your phone” or “sorry, tourist card only.”
That story finally changes in 2025.
JR East and the PASMO operators have gradually brought back those simple, anonymous plastic cards that locals use every day. If you like the idea of a no‑nonsense, reloadable card you can keep for years, this is what you’ve been waiting for.
Where regular Suica & PASMO are sold again
So what does “they’re back” actually mean when your feet hit the platform?
In practical terms, it means you’ll see IC card vending machines selling:
- Regular, anonymous Suica on JR East lines (Tokyo and surrounding regions)
- Regular, anonymous PASMO on private railways, subways, and some bus operators in the Tokyo area
These machines are slowly returning to:
- Major JR East stations: Tokyo, Shinjuku, Shibuya, Ueno, Ikebukuro, Yokohama, etc.
- Big PASMO-network stations: Asakusa, Ginza, Shimbashi, Oshiage/Skytree, and other busy hubs
- Some mid‑size suburban stations as stock levels improve
Think of it like this: the busier the station, the higher your chances of seeing a machine that sells new cards.
A quick, real‑world example:
- You land at Haneda, ride into town on the monorail or Keikyu, and end up at Shinagawa Station.
- Follow the signs to the JR ticket machines near the central gates.
- Look for machines showing the green Suica penguin logo and a button that clearly says “IC Card” or “Suica.”
- Tap the English button, choose “Purchase New Suica,” insert cash, and you’re done in under a minute.
The same pattern works on the PASMO side at places like Shinjuku Station (Odakyu/Keio/Toei) or Asakusa Station (Tokyo Metro).
How to spot the right machines
Not every ticket machine will sell new IC cards, so here’s what to watch for when you’re strolling through a station:
- Logos on the machine: Suica’s green penguin or PASMO’s pink logo somewhere on the front panel or screen.
- “IC Card” wording: On the screen you’ll often see options like “Purchase Suica,” “IC Card,” or “IC Card New Issue.”
- Language button: Almost all big-city machines have an English button in one of the corners of the screen. Tap that first and the whole process becomes straightforward.
If you’re unsure, do what locals quietly do all the time: stand to the side for 30 seconds and watch what people are actually pressing. If someone taps, pays, and walks away with a green (Suica) or pink (PASMO) card, that’s your machine.
And if you still can’t find it? Station staff are used to this. Just point to the Suica or PASMO logo on a sign and say:
“Suica card?” or “PASMO card?”
They’ll usually walk you over or point clearly. Japan’s rail staff might look busy, but they’re often impressively patient with lost travelers.
“Travel is never a matter of money, but of courage.” – Paulo Coelho
Sometimes that “courage” is just being willing to ask a station attendant for help instead of wandering in circles for 20 minutes.
Registered vs unregistered cards: should you care?
Now that regular cards are back, you might run into terms like “registered” or “anonymous” Suica/PASMO. Here’s what those mean in normal human language.
- Unregistered (anonymous) cards
These are the quick ones you buy from vending machines:- No name printed on them
- No form to fill out
- No ID needed
- Perfect if you just want to tap in, tap out, and not think about it
- Registered cards
These are sometimes called “My Suica” or similar:- Linked to your name and basic details
- Usually issued at a staffed counter instead of a machine
- If you lose the card, staff can often reissue it with your remaining balance (and commuter pass, if you had one)
For most visitors, an anonymous card is totally enough. You walk up, buy it, and you’re moving within minutes.
When is a registered card worth the extra effort?
- You’re staying in Japan a few months or longer and will use trains all the time.
- You’re planning to buy a commuter pass between your accommodation and a school/office.
- You’re the type of person who loses things and will sleep better knowing your balance can be recovered.
Most short-term tourists I talk to say the same thing: “If I lose my card once in 2 weeks, that’s on me.” The convenience of an instant, anonymous card usually beats filling out forms in a foreign language at a busy counter.
So unless you have a long stay or a specific reason, I’d treat “registered vs unregistered” as something you don’t need to stress about. Just grab the anonymous one and get on with your trip.
How the deposit and refunds work (and how not to lose money)
One quirk of regular Suica and PASMO (compared to tourist-only cards) is the deposit. This is something you’ll want to understand before you leave, so you don’t end up making a last-minute sprint to a service counter with your suitcase and a half-eaten onigiri.
The basic setup
When you buy a regular Suica or PASMO, you usually pay:
- 500 yen deposit – this is the refundable part
- + stored value – usually 1,500 yen, 2,000 yen, or whatever amount you choose
So if you buy a “2,000 yen” Suica from the machine, what’s actually happening is:
- 500 yen goes in as the deposit
- 1,500 yen is your usable balance for trains, buses, shops, etc.
That deposit isn’t a fee. You can get it back if you formally return the card.
How refunds work
To cash out your card at the end of your trip, you need to go to a staffed service counter that handles that card:
- Suica → JR East ticket office or “Midori no Madoguchi” in the Suica area
- PASMO → a major private railway or subway service counter in the PASMO area
When you return the card, they normally:
- Give you back the 500 yen deposit
- Refund your remaining stored balance, possibly minus a small handling fee (often around 220 yen if you’re withdrawing the balance)
That handling fee is the “gotcha” that catches a lot of people off guard. If you only have, say, 150 yen left on the card, it’s not even worth processing the refund for the balance. But the deposit is still yours.
How not to lose money (or your cool) at the airport
A few field-tested tips from watching jet-lagged travelers try to solve this on the spot:
- Don’t leave refunds for the last 15 minutes.
Lines at airport service counters can be long, especially around check‑in peaks. If you want to get your money back, aim to do it 30–60 minutes before you actually need to be at your gate. - Run the balance down on purpose.
On your last couple of days, try to use up your remaining balance on:- Convenience store snacks and drinks
- Final metro rides to your hotel/airport line
- Vending machines at the platform (your future self at the airport will thank you)
Arriving at the counter with a near‑zero balance means there’s almost nothing to lose to fees.
- Decide if the deposit is “souvenir money.”
If your trip is short and 500 yen isn’t a big deal, you can simply keep the card as a souvenir and reuse it next time you’re in Japan. Regular Suica and PASMO don’t have the 28‑day expiry that tourist cards do, so they’re great “I’ll be back” tokens. - Know that partial refunds don’t work across regions.
Suica and PASMO are widely accepted across Japan, but the refund has to be done in their home area. You can’t go to a station in Hokkaido or Fukuoka and expect to cash out a Suica you bought in Tokyo.
In 2019, JR East reported that there were tens of millions of Suica cards in circulation. A huge number of those are sitting in drawers around the world, quietly waiting for their owners to return. If you think there’s even a chance you’ll be back, it’s often better to keep the card and skip the airport stress.
All of this might sound like a lot of logistics for one thin plastic card, but once it’s in your hand, the psychological shift is huge. You stop thinking, “How do I pay for this train?” and start thinking, “Where do I want to wander next?”
Of course, there’s one more twist: you don’t actually need plastic at all. Your phone can act as your IC card, with instant top‑ups and no deposit to worry about. Is that actually easier in 2025, or just one more tech headache waiting to happen? Let’s look at that next…
Mobile Suica & PASMO: using your phone as your IC card
Picture this: you walk off the train in Shinjuku at rush hour, thousands of people streaming through the gates, and you glide through with a single tap of your phone. No fumbling for coins, no wondering where you left that little plastic card.
That’s the promise of Mobile Suica and Mobile PASMO – turning your smartphone into a full IC card so you can focus on where you’re going, not how to pay for it.
Who should seriously consider mobile IC cards
Mobile IC isn’t for everyone, but for the right traveler it’s honestly a game changer.
You’ll probably love using your phone as your IC card if:
- You’re on a reasonably recent iPhone (typically iPhone 8 and newer) and you’re comfortable switching your region to Japan in Settings if needed.
- You’re on an Android phone with NFC‑F / Osaifu‑Keitai support (many Japan‑market or high‑end global models have this) and you don’t mind installing a Japan‑focused app.
- You hate handling coins and small cash and want to top up with your credit card or from your digital wallet instead of feeding coins into machines.
- You already live on your phone – you use it for boarding passes, hotel bookings, and maps, so adding trains and convenience stores feels natural.
On the other hand, mobile IC might not be worth the effort if:
- You struggle with apps and settings or get stressed just thinking about changing phone regions and wallet settings.
- You don’t have reliable data/roaming and know you’ll arrive in Japan tired, offline, and not in the mood to troubleshoot anything.
- You’re nervous about Japanese‑only screens – Suica and PASMO have improved, but some setup flows, especially on Android, still sprinkle in Japanese text.
- You’re traveling with kids or a group and need multiple cards; in that case, a quick stop at a machine to grab physical cards for everyone can be faster.
One travel survey from JTB in late 2024 noted that more than half of younger foreign visitors used some form of mobile payment during their trip, but only a smaller chunk had actually set up mobile IC. The pattern I see in real trips: the more digital stuff you already use at home, the more likely mobile Suica or PASMO will feel natural and stress‑free.
“Travel light enough and your phone becomes your wallet, your ticket, your map – and eventually, your memory of where you’ve been.”
Basic setup flow (without turning this into a tech manual)
I won’t bore you with button‑by‑button instructions, but here’s how the process usually looks so you know what you’re signing up for.
On iPhone (Apple Pay)
- Open the Wallet app, tap the + button.
- Add a new card and look for Suica or sometimes PASMO (availability can depend on your region settings).
- Create a new virtual card or, if you already own a physical Suica, you may be able to transfer the balance into your phone once.
- Add an initial balance (for example, ¥2,000–¥5,000) using:
- A credit card stored in Apple Pay (many Visa/Mastercard cards from outside Japan work fine, but not all).
- Or by charging at a ticket machine or convenience store once you arrive.
Once it’s added, you can set Suica as an “Express Transit” card, which means you just tap your locked phone on the gate reader and it works instantly – no Face ID, no PIN.
On Android
- Make sure your phone has NFC enabled and supports the Japanese standard (NFC‑F). Many cheaper global phones don’t, and that’s a hard stop.
- Install the official Suica or PASMO app, or use Google Wallet if it supports transit cards for Japan in your region. This can be where some foreign users run into region/app store limitations.
- Create a new IC card inside the app and load an initial balance by:
- Linking a compatible credit card or payment method, or
- Charging in person at a station ticket machine (hold your phone to the IC reader, just like a plastic card).
A few very common pain points I see travelers complain about on Reddit and TripAdvisor:
- Foreign credit cards not accepted: even in 2025, some non‑Japanese cards get rejected, especially on Android. If that happens, just plan to top up in cash at machines – it still beats losing a physical card.
- Region settings roadblocks: some people can’t even see Suica/PASMO as an option until they temporarily switch their phone region or app store country to Japan. It’s not hard, but it does freak some folks out.
- App interface in Japanese: older versions of the apps were almost fully Japanese. Newer builds and wallet integrations are better, but I’d still be ready to use a mix of screenshots and Google Lens if you hit kanji walls.
The key mindset: try setting things up at home on Wi‑Fi before you fly. If it works – fantastic. If it doesn’t, no panic. You’ll just get a plastic card at the airport and move on with your life.
Practical pros and cons vs plastic cards
So how does a mobile IC card actually compare to that classic green Suica or pink PASMO in your hand?
Why mobile can be better than plastic
- No card to lose – if you’re the type to misplace anything smaller than your passport, having your balance tied to your phone can be a huge relief.
- Offline friendly – once it’s set up, Suica/PASMO on your phone doesn’t need data or Wi‑Fi at the gate. The phone and gate talk directly over NFC.
- Instant top‑ups – if your credit card works, you can add money in seconds on a platform when you realize you’re almost empty.
- Easier expense tracking – you can usually see transaction histories in the app or wallet, which is handy if you’re watching your budget or splitting costs with someone.
- One less thing on the keychain – minimalists and carry‑on‑only travelers tend to love this.
Where plastic still wins
- Battery anxiety – if your phone dies mid‑day and you haven’t charged it, you’re suddenly explaining things to station staff. Gates can’t charge your phone, and while staff can manually process you through, it’s an awkward 5–10 minutes you don’t need.
- Group travel – a family of four is not going to use one phone as everyone’s “card.” Getting a physical IC card for each person, including kids, is usually simpler.
- Faster at scale – with a physical card, you just tap and go. With phones, people sometimes fumble with screen orientation, unlocking, or holding it wrong over the reader if they’re not used to it.
- Setup stress – if the idea of changing regions, downloading extra apps, or guessing through Japanese prompts makes you feel tired already, that’s your sign to grab plastic and call it a day.
- Souvenir factor – a physical IC card is a fun little reminder of your trip. Your phone balance… not so much.
A lot of travelers land in the “hybrid” zone: they set up mobile Suica on their own phone and buy one physical card for their partner or kid. That way someone always has a working card even if a phone battery drops to 1% in the middle of Kyoto.
From watching how people actually move through Tokyo’s stations, here’s how I tend to summarize it:
- If you like tinkering a bit with tech and you’re already using Apple Pay or Google Wallet at home, mobile IC is fantastic. Once it’s running, it feels futuristic in the best way.
- If your idea of a good vacation is “zero hassle” and you don’t want to think about settings or error messages, a plastic card from the airport is still king.
Either way, once you’ve picked your card – phone or plastic – the real fun begins: actually using it on trains, subways, buses, vending machines and even lockers. So how does that tap‑and‑go magic work in the real world when you’re juggling luggage and trying not to miss your stop?
Let’s walk through that next – starting with what actually happens when you tap in at a Tokyo train gate and how to avoid those dreaded error beeps…
Using your IC card like a pro: trains, buses, shops, and gotchas
If getting the card is step one, using it smoothly is where your trip actually starts to feel easy.
Think of your IC card as your “Japan key”: trains, subways, buses, snacks, drinks – all unlocked with one quick tap. Once you get the hang of a few habits, you’ll move around the country like you’ve lived there for years.
“Travel is easiest when you turn decisions into simple rituals.”
Let’s turn that little plastic card (or phone) into one of your easiest rituals in Japan.
Everyday use on trains and subways
Here’s the rule that will save you from 90% of IC card confusion:
Tap once to go in. Tap once to go out. That’s it.
No double taps, no waving it around. Just a clean, single touch on the blue IC pad.
On almost all JR lines, subways and many private railways in big cities (Tokyo, Osaka, Kyoto, Nagoya, Fukuoka etc.), Suica, PASMO, ICOCA and friends all work the same way.
What it looks like in real life:
- At the start of your trip: walk up to the ticket gate, hold your card flat over the IC reader (usually glowing blue). You’ll hear a beep, the gate flaps open, and your balance flashes briefly on the small screen.
- At the end of your trip: do the same at the exit gate. Another beep, gate opens, balance updates.
If the gate makes a longer beep and the flaps don’t open, don’t panic. Look at the little screen for a second:
- Not enough balance – usually shown with a “△” or red text and a low amount. Just step aside, top up at the nearest IC machine, and try again.
- Card reading error – often happens if your wallet is stuffed with other contactless cards. Try again with just your IC card or phone.
Taking a wrong turn or missing your stop
You will do this at least once. Everyone does, jet lag or not.
If you exit at the wrong station or ride past the station you paid for, you don’t need to buy a new ticket – your IC card keeps track of where you entered.
- Follow the signs for “Fare Adjustment” (look for something like 運賃精算).
- Tap your card on the machine.
- It will show you how much extra you owe.
- Feed in coins or bills, tap again, and your card is updated.
If you really get stuck (wrong gate, strange transfer, you forced your way through because you panicked), just walk to the nearest manned gate and show your card. Station staff are used to this – a quick “Sumimasen” and confused face is usually enough context.
A quick reality check: in Greater Tokyo alone, over 40 million people use IC cards on trains and subways every day. The system is built to handle mistakes, not punish them. As long as you’re not jumping gates on purpose, they’ll help you sort it out.
Buses, vending machines, and stores
Once you’re comfortable at the ticket gates, you can start using your IC card for the small things that usually slow travelers down: buses, snacks, coffee, coin lockers.
How to use your IC card on buses
Bus rules vary a bit by region, but here are the two main patterns you’ll see:
- Flat-fare city buses (common in central Tokyo)
– You usually tap when you get on at the front door.
– The fare is the same no matter where you get off, so there’s often no need to tap when you exit. - Distance-based buses (common outside city centers, in Kansai, regional areas)
– You tap when you board (front or middle door, depending on the bus).
– You tap again when you get off by the driver, and the system calculates the fare based on how far you went.
Most buses will have stickers near the door showing IC logos – Suica, PASMO, ICOCA, etc. If you see the logos, you’re good.
Key bus tips from the road:
- Have your card ready before you step on. Nothing makes you feel “tourist” faster than blocking a bus with your backpack while you search for your card.
- Tap flat, not at an angle. The reader is usually on top of a small machine next to the driver – just place your card or phone on it until you hear the beep.
- If you’re unsure whether to tap off, watch what locals do at the door. Japan is the easiest country in the world for copying the right behavior.
Spending IC balance in shops and vending machines
This is where an IC card really starts earning its place in your pocket.
You can usually pay with IC cards at:
- Convenience stores: 7‑Eleven, Lawson, FamilyMart, NewDays (inside stations) and most regional chains
- Station kiosks: little stands selling drinks, sandwiches, bento
- Many vending machines: look for the familiar IC logos and a card reader near the coin slot
- Some cafes and fast food places: especially chains around stations
- Coin lockers: in major stations and tourist hubs (often incredibly handy if you arrive before hotel check‑in)
Paying is usually easier than using cash:
- The staff punches in the total.
- They might ask, “Suica desu ka?” or just point to the IC reader.
- You hold your card or phone to the IC pad until it beeps.
That’s it. No counting coins, no accidentally handing over a 500 yen coin thinking it was 50. If you’ve ever ended a Japan trip with a bag full of random coins, using your IC card for small purchases feels like a little everyday victory.
Fun detail: JR East has reported for years that a huge share of station vending machine purchases are done with IC cards now. Locals don’t think of these as “train cards” anymore – they’re just money that beeps.
Common mistakes and how to avoid them
Most IC problems are tiny and fixable, but they can feel stressful when you’re already trying to find the right platform. Here are the main traps I see travelers fall into – and how to skip them.
1. Keeping your IC card buried with other cards
If your IC card is in a fat wallet next to your credit cards, hotel key and another IC card you bought by mistake… the gate has no idea which one to read.
That’s when you get the dreaded long beep and the red light.
Quick fix:
- Keep your main IC card in its own pocket, or
- Use a simple pass case or lanyard you can pull out or wear around your neck.
A lot of commuters in Tokyo hang their IC card on a little strap from their bag. It’s not a fashion statement – it just makes life easier.
2. Mixing phone and plastic in the same tap
If you’re using Mobile Suica/PASMO and still carrying a physical card “just in case”, make sure they don’t both touch the reader at once.
Gate readers are like toddlers: give them one clear choice, not options.
How to avoid weird errors:
- Pick one main card (phone or plastic) for gate use and stick with it.
- If you carry both, keep the backup one in a different compartment so it’s nowhere near the reader.
3. Running out of balance mid‑trip
This one is almost guaranteed to hit you on a day when you’re tired and just want to get back to the hotel.
When your balance is too low, the gate simply won’t open. But you don’t have to buy anything new; you just need to feed the card.
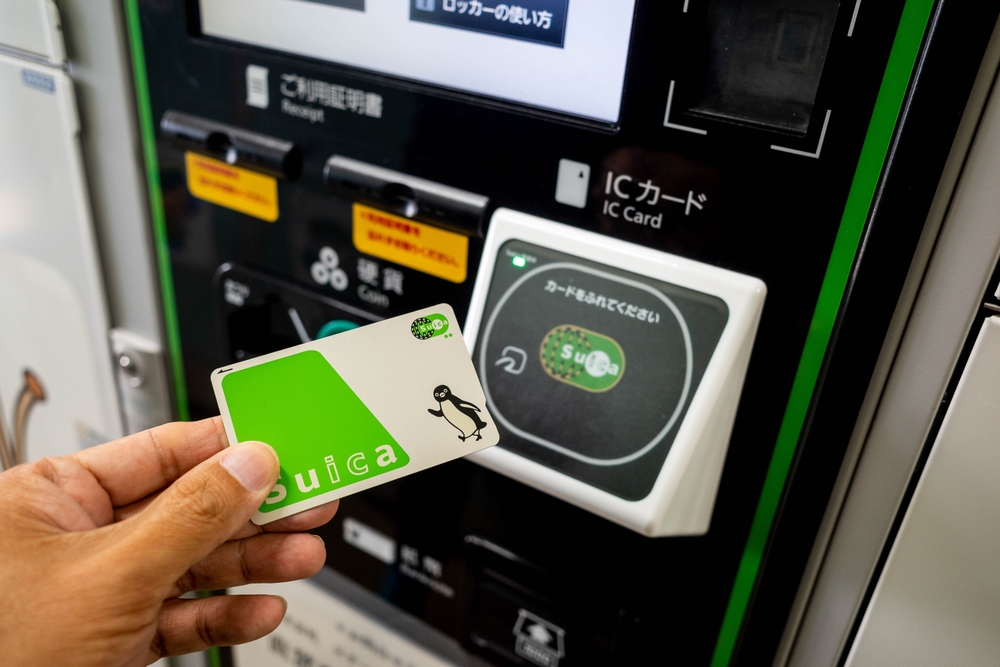
Topping up is fast once you know what to look for:
- Find a machine with the Suica/PASMO/ICOCA logo and an “IC Charge” or “チャージ” button.
- Tap the English button – it’s almost always there on machines in big cities.
- Insert your card in the slot or place it on the reader as shown.
- Select an amount (1,000 / 2,000 / 5,000 yen are common shortcuts).
- Insert cash, wait for the confirmation, and you’re done.
If you’re using a mobile IC card and your foreign credit card is accepted, you can often recharge straight from your phone instead. But I’d still learn the cash top‑up method – it’s foolproof and doesn’t depend on apps or Wi‑Fi.
Pro habit: keep at least 1,000–2,000 yen on your card. That’s usually enough to cover several train rides plus an emergency drink or snack.
4. Tapping the wrong spot on the reader
Especially with phones, people tend to wave them around like magic wands.
The NFC antenna on phones is in a specific place (top, middle or near the camera depending on the model). If you don’t get a beep, just try moving a little slower and touching a different part of your phone to the reader – not harder, just more deliberately.
With plastic cards, lay them flat, not at an angle. The readers are designed for that.
5. Forgetting where you tapped in
This usually happens on complicated days with lots of transfers. You might accidentally leave the station via a side exit without tapping out, then try to enter again somewhere else. The system still thinks you’re inside the network.
If the gate refuses you with an error and you can’t figure out why, just:
- Go to a manned gate.
- Show your card and say “Sumimasen” with a small “lost” gesture.
- They’ll reset the trip on their console, sometimes asking which station you entered from. A simple station name or pointing on a map is usually enough.
It’s less a “you did something wrong” situation and more “the system needs to be told where you are again”.
6. Getting stuck at the gate with a low phone battery
If you’re using a mobile IC card, remember: the phone doesn’t need signal, but it does need some battery. On iPhone, Express Transit can work for a bit even on a “dead” screen, but I wouldn’t rely on it as your only plan.
What I do personally:
- Keep a small power bank in my day bag (Japan train days are long).
- Top up the battery a bit while sitting on longer rides.
- On very long days, I’ll sometimes use a physical card for peace of mind and save the phone for payments in shops.
If your battery does die and you’re trapped inside the gates, again: walk to a manned gate, show your phone and explain with body language. They see this all the time with locals too.
7. Forgetting that not all corners of Japan use IC
In most big cities, you’ll start taking IC acceptance for granted. Then you hit a small rural line or an old bus, and suddenly it’s cash only.
This is rare on classic tourist routes, but it still exists.
Simple fix: always carry a bit of backup cash. Think of your IC card as your main tool and coins as your backup battery.
Once you’ve used your IC card for a full day – trains, a bus or two, coffee, snacks and a coin locker – you’ll notice something important: you’re thinking less about how to get around and more about what you actually came to see.
Now the fun part is planning around your arrival airport and cities so that getting a card (or backup option) is automatic, not stressful. Want a simple, no‑stress game plan for Narita, Haneda, Kansai and smaller airports – and what to do if IC cards aren’t available when you land?
That’s exactly what I’ll break down next.
Planning tips, backup options, and useful resources
If you sort out your IC card plan before you land, everything that comes after—jet lag, luggage, hungry kids, missed connections—gets a lot easier to handle.
This is where I stop talking about “what IC cards are” and start talking about “what exactly you should do when you step off the plane at 6:30 a.m. with no coffee.”
My recommended “no‑stress” plan by arrival airport
Let’s keep this brutally practical. Here’s how I’d tell a friend to plan it, based on where they land.
Narita or Haneda (Tokyo)
If you’re flying into Tokyo, you’re in the best possible position. These two airports are still the easiest places in Japan for tourists to grab an IC card straight away.
Your game plan:
- Follow the signs to JR East Travel Service Center (often near the big train ticket counters), or
- Look for IC card vending machines with Suica logos near the train gates (especially at Narita and Haneda Terminal 3 arrivals).
Here’s how I’d sequence it:
- Try for a Welcome Suica first.
The counters and machines that sell it at Narita and Haneda are clearly marked, and staff are used to dazed tourists asking, “Welcome Suica?” while holding their passports and a suitcase that’s about to roll away.Why start with it? Because you:- Skip the deposit/refund headache
- Get a simple, tourist‑friendly setup that lasts your whole typical vacation
- Walk out of the airport ready to tap into the train and buy snacks from the first vending machine you see
- If Welcome Suica isn’t available, don’t panic.
This happens occasionally during busy travel weeks or if a specific machine is temporarily out. In that case:- Ask staff for a standard Suica or PASMO (unregistered adult card is totally fine)
- Or use the English button on the machine and look for “Purchase New IC Card”
- Load a reasonable first amount.
For a Tokyo stay, I suggest starting with around 3,000–5,000 yen. Studies on tourist spending patterns in Tokyo public transit (like data shared by the Tokyo Metropolitan Government) show most short‑term visitors easily burn through that in a few days on trains, snacks, and convenience store runs.
By the time you reach the city, the transport side of your trip is already on autopilot. No fare charts, no ticket queues. Just tap in, tap out, eat ramen.
Kansai International Airport (Osaka)
If you’re heading straight into Osaka, Kyoto, Kobe, or Nara from Kansai Airport (KIX), your “local hero” is ICOCA.
What to do when you land:
- Follow signs to JR West ticket counters or IC card vending machines
- Ask for or select ICOCA (there are sometimes tourist versions or sets that bundle it with train tickets into the city)
- Load a similar amount to the Tokyo case—around 3,000–5,000 yen to start
ICOCA works almost exactly like Suica or PASMO when you get to other major cities. I’ve used ICOCA bought at KIX in Tokyo, Nagoya, Hiroshima—no issue. For 99% of tourist use, it’s just “an IC card that works.”
One fun note: JR West occasionally runs surveys showing that first‑time foreign visitors who grab ICOCA at KIX spend noticeably less time at ticket machines on later days of their trip. They don’t even have to understand Japanese to benefit—the card does the thinking for them.
Smaller regional airports (Sapporo, Fukuoka, Okinawa, etc.)
Regional airports can be hit‑or‑miss for immediate IC card availability. Some will have:
- Local IC card brands (like Kitaca in Hokkaido or SUGOCA in Kyushu)
- Limited counters with English support
- Or nothing obvious at all when you first walk out of arrivals
Here’s the low‑stress way to handle it:
- Don’t waste time hunting every corner of the airport. If you don’t spot IC machines or a clearly labeled counter within a few minutes, move on.
- Plan to buy your IC card at the first major train or metro hub you reach. Think big stations: Sapporo Station, Hakata Station (Fukuoka), Sendai Station, etc.
- Use a simple paper ticket just to get to that first hub. One machine interaction, then you’re done with paper for the rest of the trip.
This “don’t force it at the airport” mindset alone can save you a chunk of stress. You’re not failing your Japan trip if you buy your IC card 90 minutes after landing instead of 10.
Even with the shortage easing, there will still be pockets of time or places where IC cards are sold out, machines are down, or staff say, “Today, no new cards.” It’s annoying, but it’s not a disaster.
Let’s make sure that if that happens to you, you shrug and keep moving instead of spiraling into “my trip is ruined” mode.
Fallback option 1: Paper tickets
Every station in Japan that takes IC cards also sells old‑fashioned paper tickets. They’re not glamorous, but they’re reliable.
How to make them painless:
- Use the English button on machines. Most urban stations have it. It usually sits on the top‑right or bottom of the screen.
- Choose your destination by station name, not fare. Newer machines often let you pick from a list or a map, so you skip the confusing fare charts entirely.
- Buy one ticket per trip. Don’t worry about “optimizing” transfers on day one. Just get yourself from A to B.
Fun fact: when Tokyo Metro tested foreign visitors’ behavior with and without IC cards, paper ticket users spent significantly more time in front of machines—but they still got everywhere they needed to go. So if you end up in that group for a day or two, you’re in good company.
Fallback option 2: Day passes and tourist passes
In some cities, a 1‑day or 2‑day pass is almost as good as having an IC card, especially on heavy sightseeing days where you’re hopping between temples, shopping streets, and food stops.
Examples:
- Tokyo: Tokyo Subway Ticket (24/48/72 hours) for Tokyo Metro + Toei Subway
- Osaka: Osaka Metro 1‑day or 2‑day pass
- Kyoto: Bus & subway day passes for inner‑city travel
These passes are:
- Easy to buy at major stations or tourist info centers
- Often clearly explained in English at the counter
- Economical if you’re hitting 4–6 rides in one day
Some city tourism boards have published their own data showing that day‑pass users tend to visit more spots and feel more “free” than pay‑per‑ride tourists, simply because they stop thinking about cost per trip. That’s exactly the psychological benefit you’d normally get from an IC card.
The sweet spot is this: use a day pass for one or two intense sightseeing days, then switch to an IC card once you manage to grab one at a big station. No need to stick to one system for your whole trip.
Fallback option 3: Phone as plan B (if you’re comfortable)
If physical cards are truly not available, and you’re a bit tech‑savvy, your phone can save the day.
- iPhone users: Newer models with the region set to Japan can add Suica directly in Apple Wallet.
- Android users: Phones with NFC‑F (often branded as Osaifu‑Keitai in Japan) can add Suica or PASMO through the relevant apps, though this can get tricky with non‑Japan app stores.
This is why I always recommend having a “Plan A” (physical card at the airport) and a “Plan B” (phone or paper tickets) in mind. When you’ve already thought through your backup, nothing feels like an emergency.
Helpful sites to check before and during your trip
The IC situation in Japan is a lot calmer than it was during the worst of the shortage, but it’s still worth spending five minutes checking current info the week before you fly.
Here’s where I’d look:
- Official JR East pages
They keep the latest rules and locations for Suica and Welcome Suica. Availability, sales points at Narita and Haneda, and time limits are usually listed clearly. - Official PASMO site
Useful for PASMO Passport locations and any temporary changes. If you’re hunting for PASMO Passport in Tokyo, this is the place to confirm whether your target station or airport currently sells it. - Official ICOCA / JR West pages
Great if you’re landing at Kansai Airport and want to double‑check ICOCA sales counters, tourist sets, and rules. - Recent, traveler‑tested guides
Well‑maintained resources like Rakuten Travel’s 2025 Suica Card Guide or TrulyTokyo’s step‑by‑step breakdowns are handy because they’re based on actual recent experiences, not just press releases. They often spell out which specific machines or counters at Narita/Haneda are easiest to use.
Think of these links as a quick pre‑flight checklist. Five minutes of checking can save you 30 minutes of wandering around an airport wondering if you’re missing a hidden IC vending machine behind a pillar.
Now, once you’ve got a rough game plan—Plan A, Plan B, and maybe even a “worst case I’ll just use a day pass”—the only real question left is this:
Given your exact trip length, where you’re landing, and how much effort you want to put into setup, what is the single easiest, most sensible IC card path for you?
That’s what I’m going to map out next: a simple, screenshot‑worthy checklist that turns all of this into “Do this, then this” so you can stop thinking about tickets and start thinking about where your first bowl of ramen will be.
Putting it all together: your easiest path to an IC card in Japan
You’ve made it through the options, the shortages, the “Suica vs PASMO vs ICOCA” mess – so let’s make this simple.
This last section is your practical game plan. Screenshot it, save it to your notes, send it to your trip group chat. If you follow this, you won’t be the person blocking the ticket gate while your jet‑lagged brain tries to read a fare chart.
Quick decision checklist
Here’s the fast “what should I actually do?” version. Think of it as your IC card flow chart, without the actual chart.
- Trip under 28 days and landing at Narita or Haneda?
→ Walk out of arrivals and go straight for a tourist IC card at the airport:- First choice: Welcome Suica or PASMO Passport from the JR East Travel Service Center or marked IC vending machines.
- If one isn’t available, just grab whatever major IC card the staff are selling – it will still work almost everywhere you need.
- Comfortable with tech and have a compatible smartphone?
→ Consider making your phone your main card:- On iPhone, add Suica or PASMO in Apple Wallet.
- On compatible Android phones, add an IC card through Google Wallet or the Suica/PASMO apps.
- Top up with a supported credit card or cash at machines if your card doesn’t work online.
Reality check: If setup takes more than 10–15 minutes or you’re stuck on a Japanese‑only screen, stop. It’s not worth burning your first night in Tokyo on app troubleshooting. Get a plastic card and move on with your life.
- Landing in Kansai (Osaka, Kyoto, Kobe) or spending most of your time there?
→ Go for ICOCA:- Pick it up at JR West counters or station machines at places like Kansai Airport, Osaka Station, Kyoto Station.
- ICOCA works in most other major cities too, including Tokyo, for regular trains and subways.
- You don’t need a “Tokyo card” just because you’re going there later.
- Already at a smaller regional airport and don’t see any IC card counters?
→ Don’t stress:- Buy a paper ticket from the machine or counter for your first hop into town.
- Once you reach a bigger hub (Sendai, Sapporo, Nagoya, Fukuoka, Hiroshima, etc.), look for IC card machines with Suica / PASMO / ICOCA logos.
- Can’t find any IC cards on day one, or they’re temporarily sold out?
→ You still have options:- Use paper tickets for trains and subways. It’s slightly slower, not a disaster.
- Look at 1‑day or 2‑day passes for subways or tourist areas – these can actually be cheaper than pay‑as‑you‑go if you’re sightseeing hard.
- Check again at a different big station the next day; availability can vary even within the same city.
- Staying more than a month or coming back often?
→ If you’re semi‑long‑term:- Consider a regular registered Suica, PASMO, or ICOCA so your balance can sometimes be recovered if lost.
- Keep it as your “Japan card” and bring it on every future trip. IC systems have been around for years and aren’t going away.
If you remember nothing else, remember this: any major IC card is fine. The “perfect” one is the one you can get quickly without a headache.
Final tips so you can focus on the fun stuff
Once you’ve got your card (or phone) set up, a few habits make the rest of your trip smoother.
- Keep a small buffer on your card.
Aim to keep at least 1,500–2,000 yen on it. That’s usually enough for a couple of train rides and a snack or drink. You don’t want to be the person holding up the gate because you’re 10 yen short. - Top up when you’re not in a rush.
Add money when you’re waiting for a train or wandering through a station, not when you’re already late. There’s a reason you always see someone frantically recharging while their train doors beep in the background. - Use it to kill your coins.
IC cards are brilliant for draining that pile of 1, 5, and 10 yen coins:- Top up with coins at a machine when your pockets start jingling.
- Pay for drinks, snacks, and small items at convenience stores – almost all of them take IC cards now.
- Keep your main IC card easy to reach – and alone.
Put it in:- a simple card holder attached to your bag, or
- a front pocket you can reach quickly.
Try not to stack multiple IC cards or other contactless cards together. Gates sometimes read the wrong one, which leads to that awkward moment where nothing opens and everyone behind you sighs in eight different languages.
- Don’t overthink “maximizing value.”
I see a lot of travelers burn hours comparing card types to “optimize” a few hundred yen. In real life, the difference between cards for a short trip is tiny. Time and brainpower are worth more than that. - Know when to ignore the internet noise.
You’ll still find posts saying “Suica is sold out forever” or “you can only use phones now.” Those were true in specific moments during the shortage but are out of date now. When in doubt, check official pages like:
There was a good lesson from the shortage years: flexibility wins. The people who had the easiest time weren’t the ones with the “best” card, they were the ones ready to switch plans – mobile if plastic wasn’t available, ICOCA when Suica was out, paper tickets when everything else failed.
Wrapping up: from ticket stress to tap‑and‑go freedom
Travel researchers like to talk about “cognitive load” – basically, how many little decisions your brain can handle before you start to feel drained. Transport in a foreign language, with complex maps and unfamiliar rules, eats into that fast.
An IC card quietly removes a lot of that decision‑making. No more:
- calculating fares every time you want to hop two stops for ramen,
- guessing which zone you’re in on a tiny printed chart,
- standing at a machine while a train you wanted pulls away in front of you.
Instead, it becomes:
- tap in, tap out, move on,
- tap for your coffee at the platform kiosk,
- tap for a bus across town when your feet give up after a long day at temples or museums.
One reader told me that once their family got IC cards at Haneda, their kids treated them like “magic wands” – every tap meant a new snack, a new train, a new adventure. That’s exactly the feeling you want.
The chaos of the chip shortage is mostly behind us now. In 2025, you can land in Japan with a simple plan:
- Grab a tourist IC card or regular Suica/PASMO/ICOCA as soon as you can, or
- set up a mobile card if your phone plays nice, or
- use paper tickets for a day or two until you reach a station that sells IC cards.
Once that’s done, your everyday transport is solved. You don’t need to think about fares, zones, or ticket types every time you move. That frees up space in your brain for the good stuff: which neighborhood to explore next, which ramen shop you’re hunting down, whether tonight is izakaya night or convenience‑store picnic night.
If you want next steps from here, check out the other guides on the blog – I’ve got planning tips for local neighborhoods, easy day trips from Tokyo and Osaka, and plenty of food suggestions that are all an IC card tap away. Sort out your card once, then let the trains carry you to the fun parts.